
Switching to a new CRM system is common when a business needs more features or room to grow. But moving all your data is a big challenge—you don’t want to leave anything important behind! With Data migration, you transfer valuable customer information from one CRM to another, like from Zoho to Salesforce. You need to figure out how to match up different parts of your data and make it fit into the new system. In this blog, we’ll dive into the details of moving data from Zoho CRM to Salesforce with a step-by-step comprehensive guide, sharing tips and tricks to make a smooth transition.
Planning the Data Migration
Before diving into the data migration process from Zoho CRM to Salesforce, it’s essential to understand that it’s not as simple as exporting data and importing it into a new system. Proper planning is key to tackling this challenge effectively. Here are some crucial steps to consider:
Understanding the Zoho CRM Structure:
- Familiarize yourself with the structure of your Zoho CRM by navigating to:
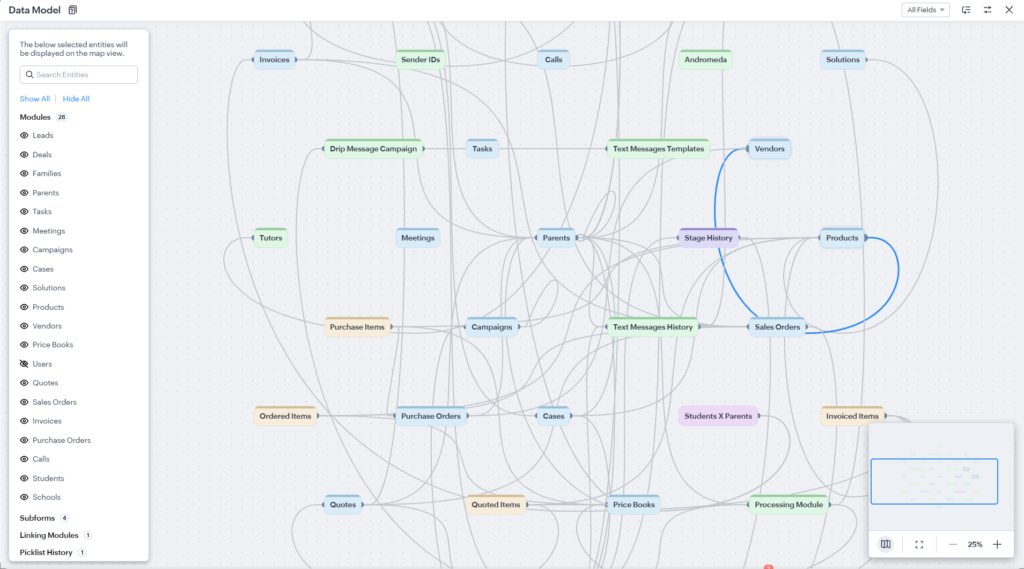
- Zoho CRM Settings → Developer Hub → Data Model
- You will be asked to Generate a Model when you visit this page for the first time. Once generated, the “View Model” button helps us observe the data model map.
- This Data Map will help you understand the connections between Zoho Modules and their fields.
Replicating the Database Schema in Salesforce:
- Replicate the Zoho CRM’s Data Model into the Salesforce Org by navigating to:
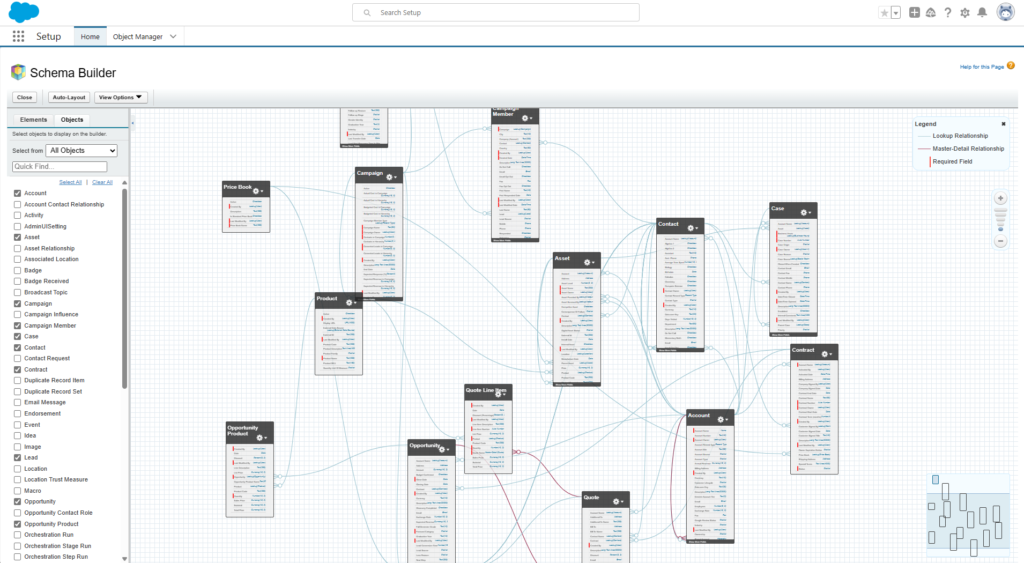
- Salesforce Setup → Objects and Fields → Schema Builder
- Refer to this Trailhead lesson to learn to work with Schema Builder.
- This step ensures consistency and alignment between the two systems.
Best practices for Data Mapping from Zoho to Salesforce:
- Zoho Modules and Salesforce SObjects often share the same name, simplifying data mapping.
- If SObjects don’t match Zoho modules, map them: Person-records to Contact, Company/Institution to Account, Deals to Opportunity, Meetings to Event, Calls to Task with subtype “Call.”
- Prioritize Standard SObjects for data storage; use Custom SObjects only if no standard option fits.
- Create Custom fields if no standard field exists to store the data.
- Salesforce lacks multi-lookup support; utilize a secondary Look-up field for Zoho’s multi-lookup data.
- Save Zoho Record IDs as External IDs in Salesforce for easy referencing.
Exporting from Zoho CRM
Now that we’ve planned our Data Migration from Zoho CRM to Salesforce, it’s time to export data from Zoho CRM for Salesforce. There are two approaches that we could prefer for this:
- Taking a Complete Backup
- Export Individual Modules
1. Taking a Complete Backup:
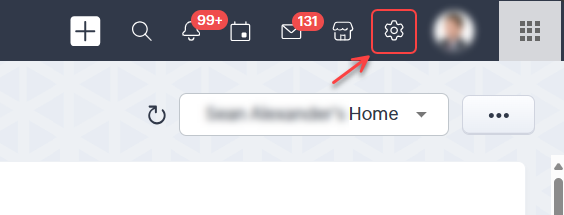
Step 1: Go to the Zoho CRM Settings by clicking the Gear Icon.
Step 2: On the Settings page, head to Data Administration → Data Backup

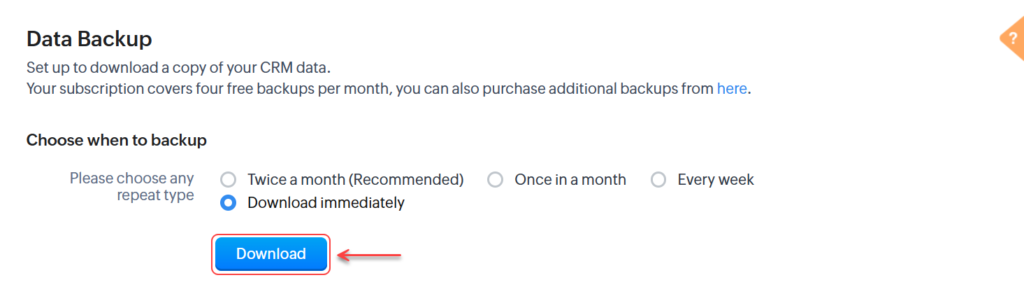
Step 3: Select the “Download Immediately” radio button for quick access to data needed for the next steps. Download may take 5-10 minutes to prepare.
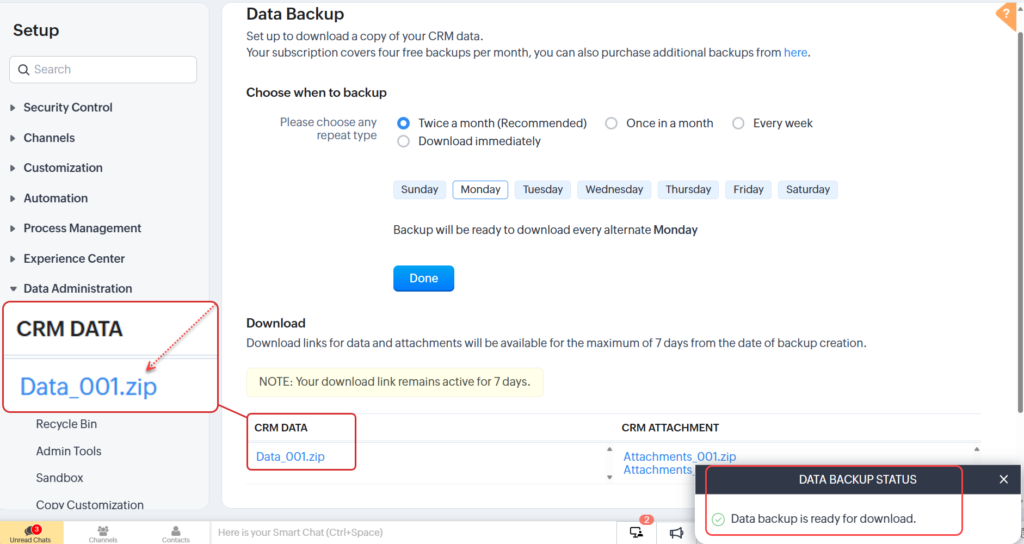
Step 4: You will be notified once the downloadable data is ready. The backup includes CRM Data and CRM Attachment. CRM Data files contain all necessary record data for migration. Click on the filename to download the file.
2. Export Individual Modules
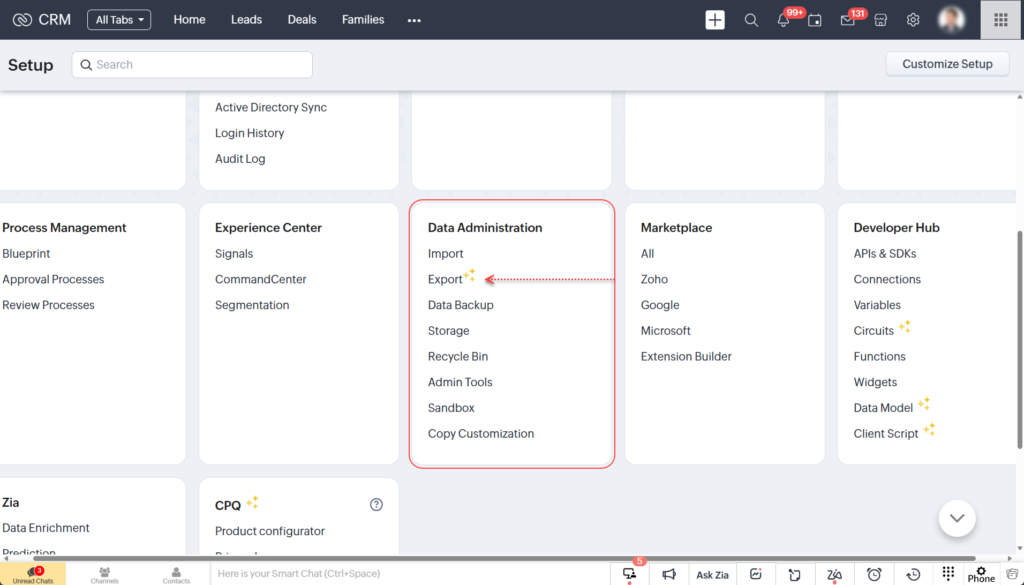
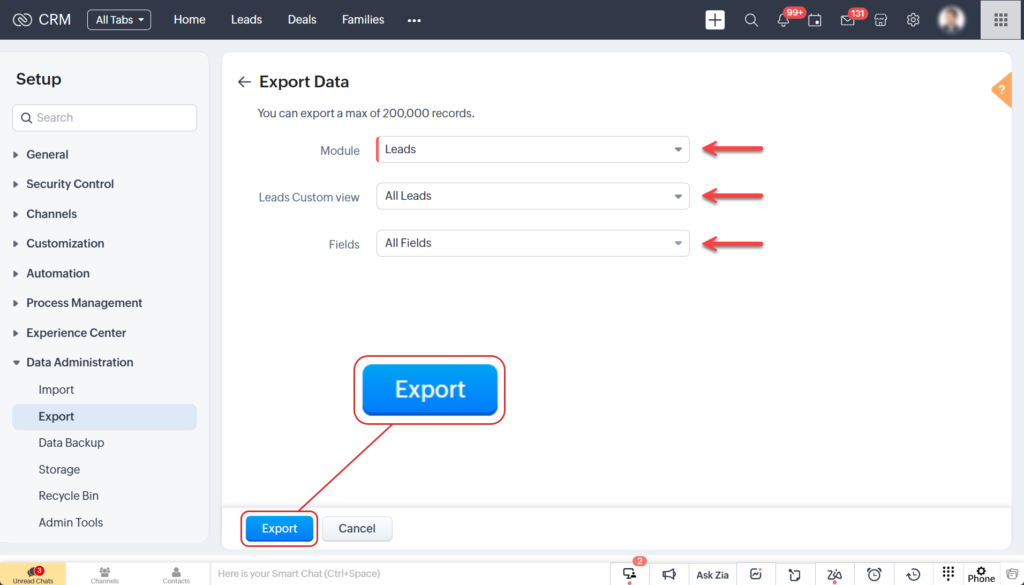
Step 1: Navigate to Zoho CRM Settings → Data Administration → Export
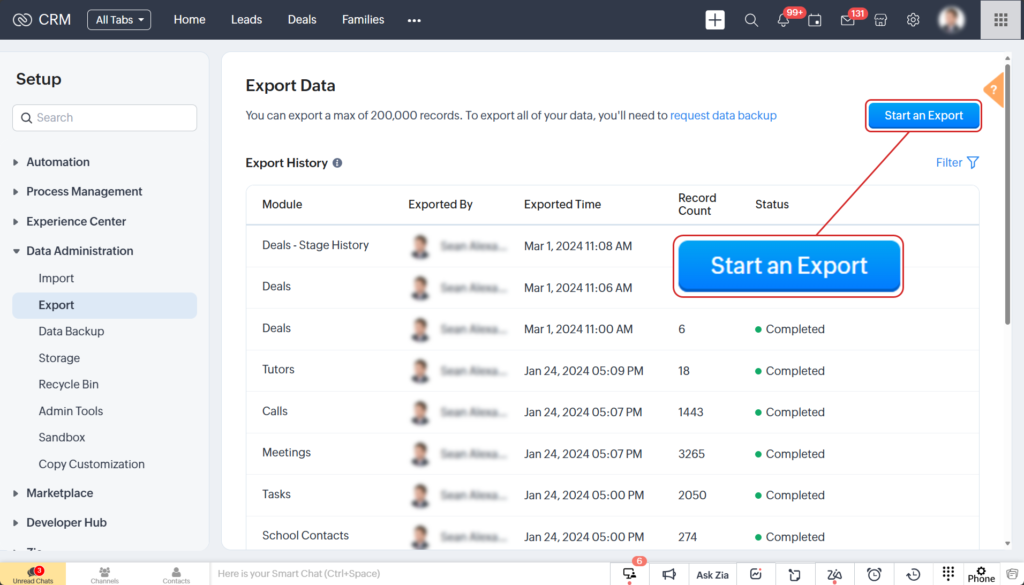
Step 2: Click “Start an Export” on this page to export specific data grouped by Modules and Custom List View.
Step 3: Next, choose the Module for export and apply filters based on a custom view. Specify the desired data columns. Then, click “Export” to initiate the export process.
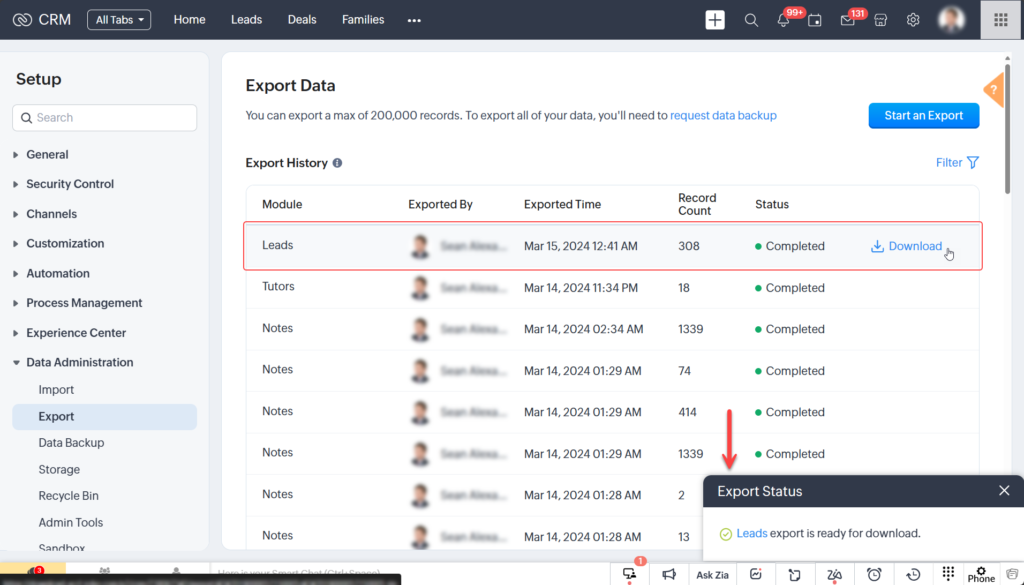
Step 4: You will be notified once the data is ready. Click the Download link to obtain the CSV file.
Best practices for Export:
- To avoid data loss, export all list views and field data during the data export process.
- The whole Zoho CRM backup should be preferred over exporting the modules individually.
Preparing the Data for Salesforce
When migrating data from Zoho to Salesforce, the data exported is typically in CSV format, which is easy for most users to understand. Advanced Excel skills may be necessary to convert some data to Salesforce-compatible format. Additionally, cleaning and filling in missing data is required to meet Salesforce’s validation rules. This section provides tips on preparing data to align with Salesforce’s guidelines.
Important Excel Function & Feature:
- VLOOKUP Function: Replaces Lookup field values with corresponding Record IDs.
- CONCAT Function: Joins values of two or more columns.
- ISBLANK Function: Checks for blank cells in the datasheet. Useful with the If function.
- COUNTA Function: Quickly counts non-blank cells, including empty text and error values.
- IF Function: Fills a cell based on certain criteria, useful in combination with other functions.
- Data Filter Feature: Groups data based on similar values for quick review and alterations.
- Find & Replace Feature: This is a handy tool for replacing multiple values with one click.
- Text to Column Feature: Quickly splits string of data into multiple rows based on predefined or custom characters.
- Data Formatting Feature: Defines formatting of values like Date to maintain uniformity.
Cleaning the Data:
- Identify and remove duplicate records to avoid redundancy and ensure data integrity.
- Remove any special characters, leading or trailing spaces, or non-standard characters that may cause issues during import.
- Ensure that the cleaned data aligns with Salesforce’s data model and guidelines to prevent errors during import.
Fill in Missing Information:
- Required data in Zoho CRM may differ from that in Salesforce, causing a validation error.
- For instance, for Contacts, Zoho CRM requires the First Name field, whereas Salesforce requires the Last Name field. Either copy or move the First Name value to the Last Name field.
- Review the Org settings to find the required field information for each SObject.
Formatting Column Data:
- Use Excel’s Formatting Feature to convert date values into the required format for the Date and DateTime fields in Salesforce. Refer to Salesforce-acceptable formats.
- Replace data for Lookup fields like Created By or Last Modified Fields with their Record ID. Export records from Salesforce with their Record ID, then use the VLOOKUP function to replace values.
- Format Recurrence Pattern for Event and Task data according to Salesforce’s guidelines. Refer to this guide for reference.
Best Practices for Preparing the Data Sheet:
- Research Salesforce’s data import format for guidance on data formatting consistency.
- Utilize External IDs to replace Record Names with Salesforce Record IDs in Lookup fields.
- Establish a hierarchy of SObjects and define relationships between them for efficient data import.
- Start importing objects higher in the hierarchy and update lookup values with Record IDs for lower-level objects.
Importing TO Salesforce
In this section, we’ll explore the process of importing data into your Salesforce Org. After preparing your CSV file according to Salesforce’s guidelines, you’ll have various options for importing data, including official and third-party tools. While many options are available, we recommend using Salesforce’s official Data Loader software for Windows and Mac for seamless integration.
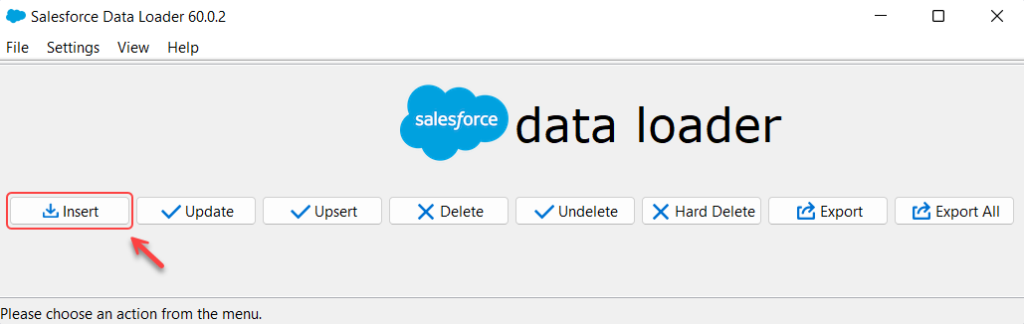
Step 1: Launch Salesforce Data Loader and click “Insert” to begin inserting data.
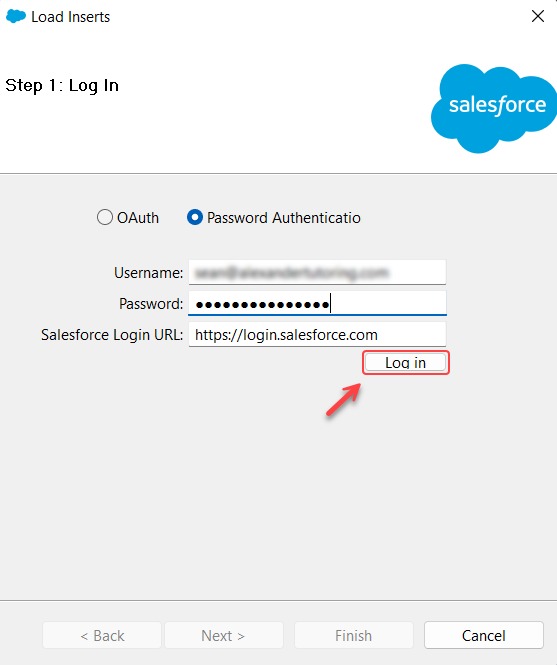
Log in to your Salesforce Org using OAuth or Password Authentication. This step is only required the first time. Note: Ensure the Username is valid for Password Authentication. Using the Sandbox Username with the Production URL logs you into the production org.
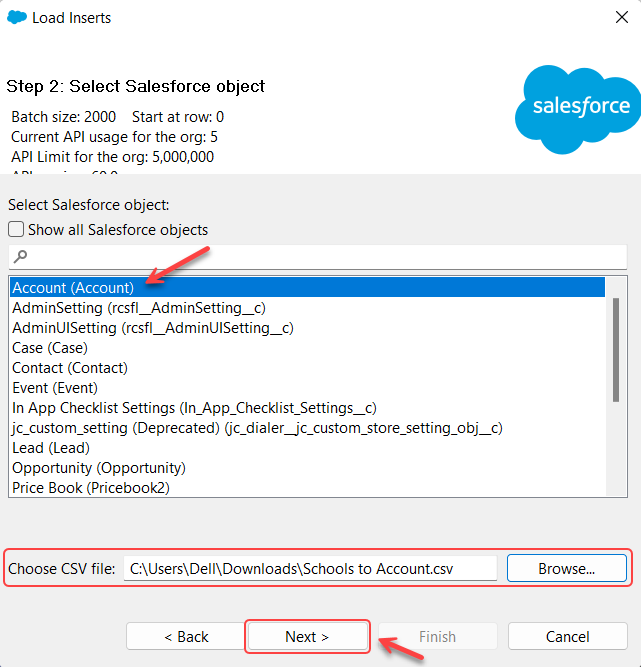
Step 2: Choose the SObject for data import, select the prepared CSV file, and click “Next” to confirm.
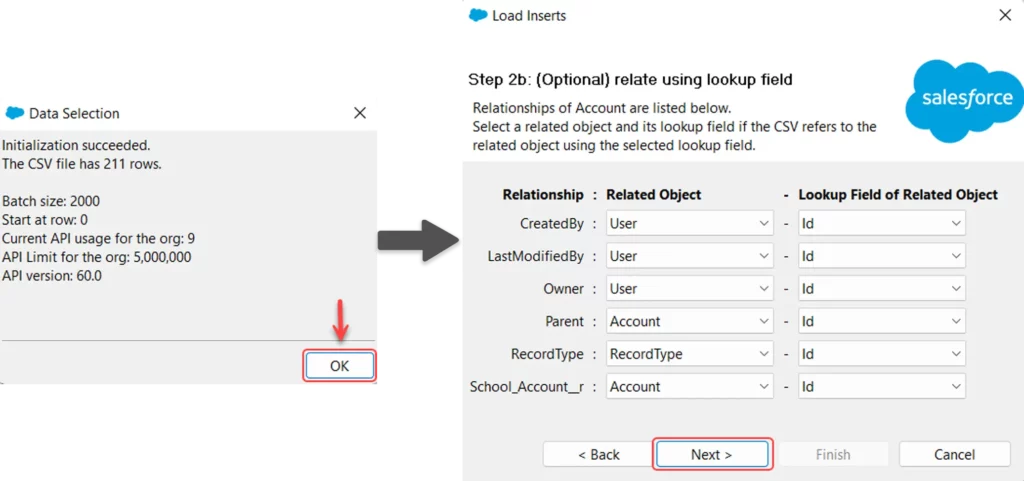
After clicking Next, a pop-up box will display the number of rows and a brief overview of additional settings. Click OK, and in the subsequent sub-step, optionally define field relationships.
Step 3: Map columns to appropriate fields. Ensure data is formatted correctly for field types. Choose to create a new field mapping or select an existing map file.
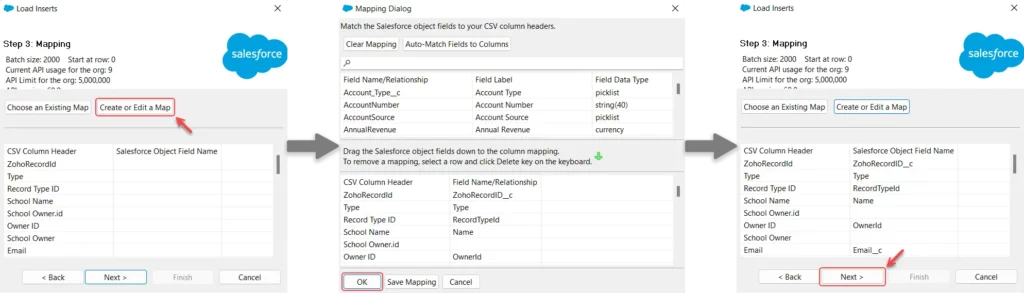
To create or edit a map, open the Mapping Dialog window and drag fields to their respective columns. Save the configuration in an SDL file by clicking “Save Mapping”. Confirm the mapping by clicking OK, then proceed to the next step by clicking “Next”.
Step 4: Choose a folder to save Error and Success logs, then click Finish. Confirm the operation by clicking OK.

Upon completion, a dialog box displays operation success and error stats. Click “View Errors” to review detailed error logs for each record.
Review the Error Log file if records fail to be inserted due to errors. Fix the errors and repeat the insertion process for the corrected records. Repeat this for each CSV file to import all data. Maintain the SObject hierarchy during data import.
Best Practices for Import:
- Use Salesforce’s official Data Loader software, available free of cost with no hidden charges.
- For alternative Data Loaders refer to our guide on 10 Best Paid & Free Data Loaders for Salesforce.
- To import the standard fields like Created Date and Last Modified By Date, be sure to assign the necessary permissions to the user. Read here to learn more.
Data migration can be time-consuming and complex, requiring a well-planned team effort. While a single employee might manage smaller tasks, large-scale migrations with millions of records necessitate additional manpower. Outsourcing to professionals like Growbiz Solutions can expedite the process and free up your team to focus on critical internal operations. Book a meeting today!