

Git
It is the application that keeps track of everything related to the changes on your project over time.
- Repositories: A collection of source files used to compile your project.
- Commits: A snapshot of your project as it existed at a specific point of time.
- Branch: A series of commits that represent the changes in your project over time.
- Merge: The combined history of two or more branches.
- Tag: A pointer to a specific commit, which provides a persistent reference to an event.
GitHub
GitHub is a Collaboration Platform. It is a host for Git repositories with collaboration features that let you apply and test changes to your code.
- Issues: Have general discussions about your project, make plans for new features, and discuss bugs.
- Pull requests: A pull request is a package of commits you’re requesting to be merged into the default branch.
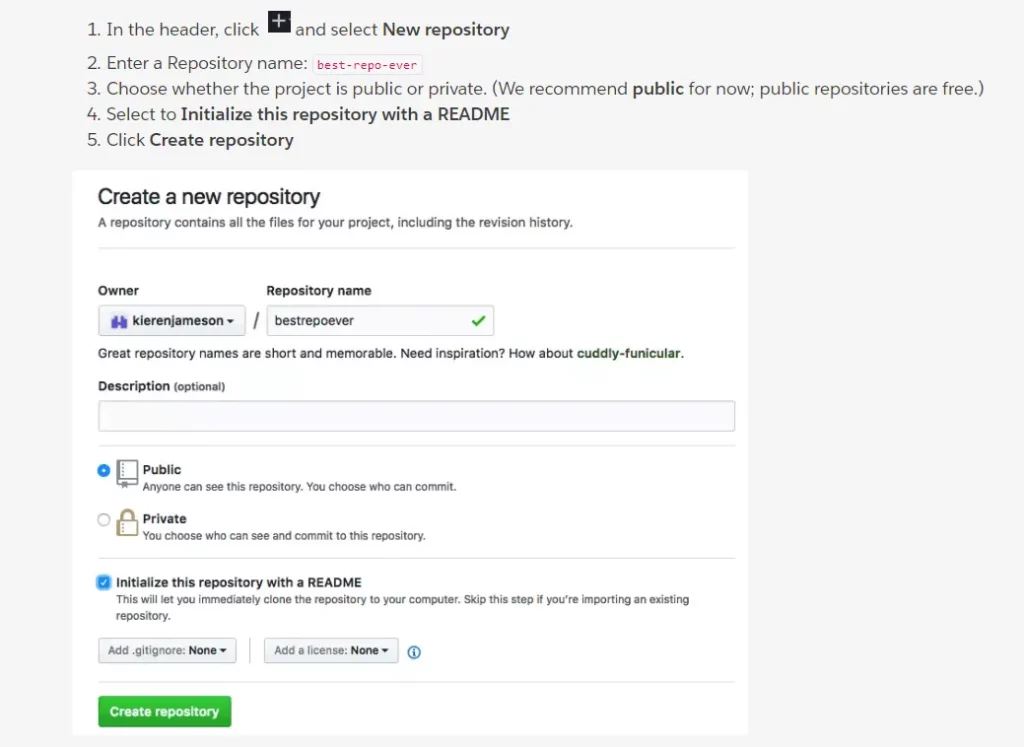
Sign Up for a GitHub Account and Create a Repository
Click on this link: GitHub personal account
Next create a repository to work with.
Working on GitHub Versus Working Locally
- You can also make changes directly on GitHub, but most people prefer to work on their local machine, so they can make changes in their favorite IDE or text editor.
- Remote Repository: It is the copy of the repository on GitHub.
- Local Repository are get repositories stored on a user’s computer.
- Remote Repository: It is the copy of the repository on GitHub.
- Local and Remote repositories only interact when you run one of the four network commands on git.
- Git clone, Git fetch, Git pull, Git push
To work locally, first we need to make a clone of remote repository.
Configure Your Local Environment
- Git config –system
- Git config –global
- Git config –local
Git uses the config settings for your username and email address to generate a fingerprint for each of the commits you create. You can’t create commits without these settings, so set them yourself using your command line application.
$ git config –global user.name “First Last”
$ git config –global user.email “you@email.com”
Configure autocrlf ( autocrlf stands for auto carriage return line feed)
- $ git config –global core.autocrlf true
Track a File with GitHub
Now that you have a local copy of the repository and you have configured Git, you’re ready to use GitHub workflow to make some changes to the project.
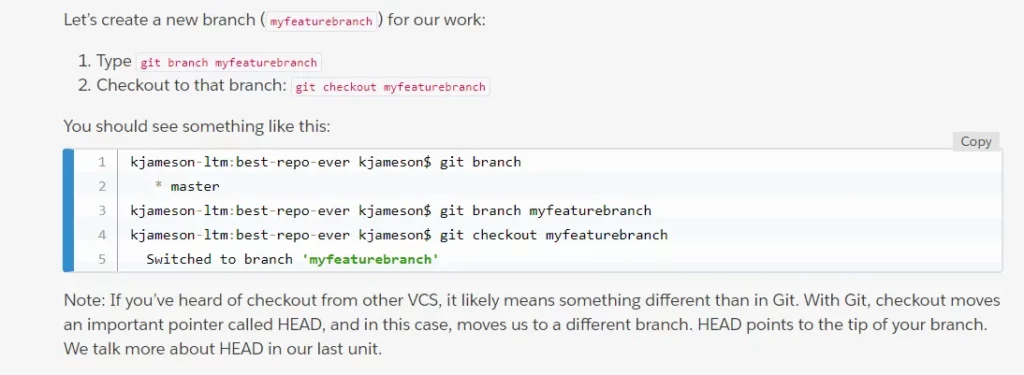
Step 1: Create a Branch
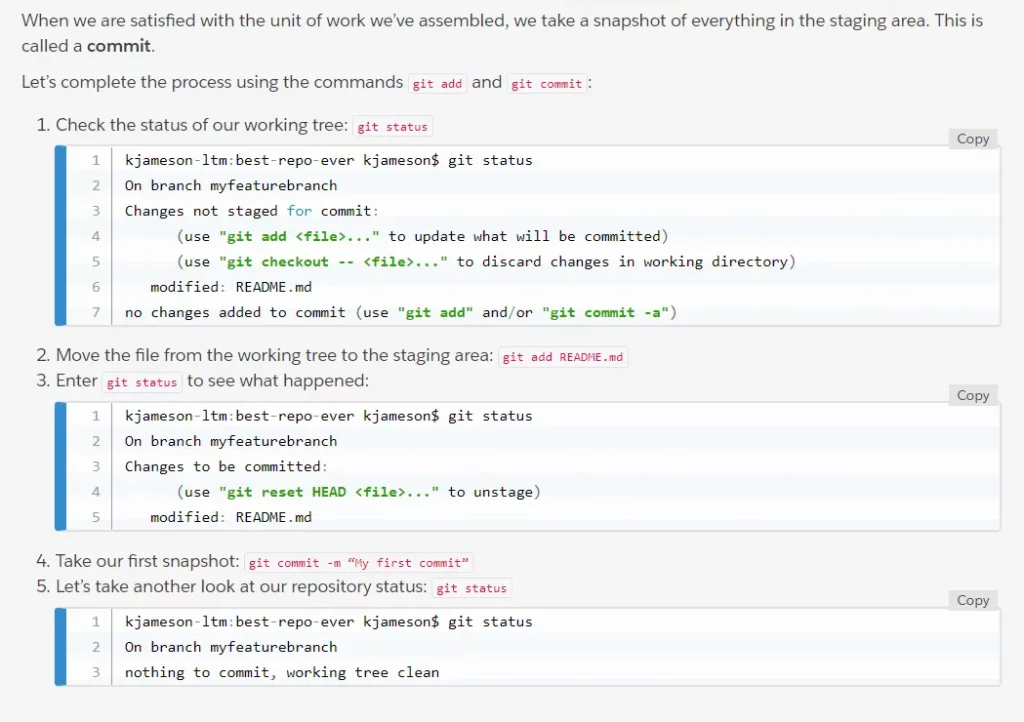
Step 2: Make changes to the README.md file and Commit the Change to Your Local Repository
Now that you’ve checked out to the new branch, well make some changes and see Git in action.
- Open the README.md in your repository.
- Add some content using your favorite text editor.
- When you’re finished, save your changes.
When we add, delete, and make changes to files, we do this in the working tree.
- Working
- Staging
- History
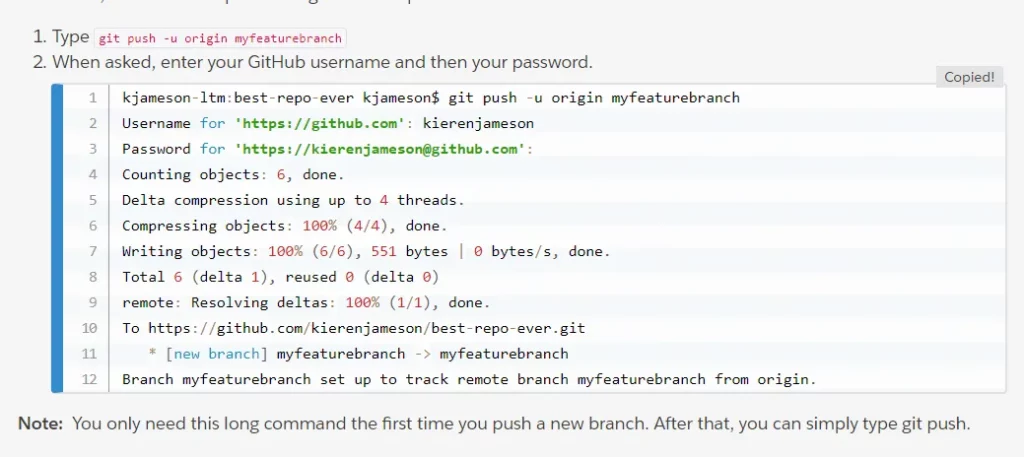
Step 3: Send Changes to the Remote Repository
This commit is only local. To see the changes on the remote, you first need to push your changes to the remote repository.
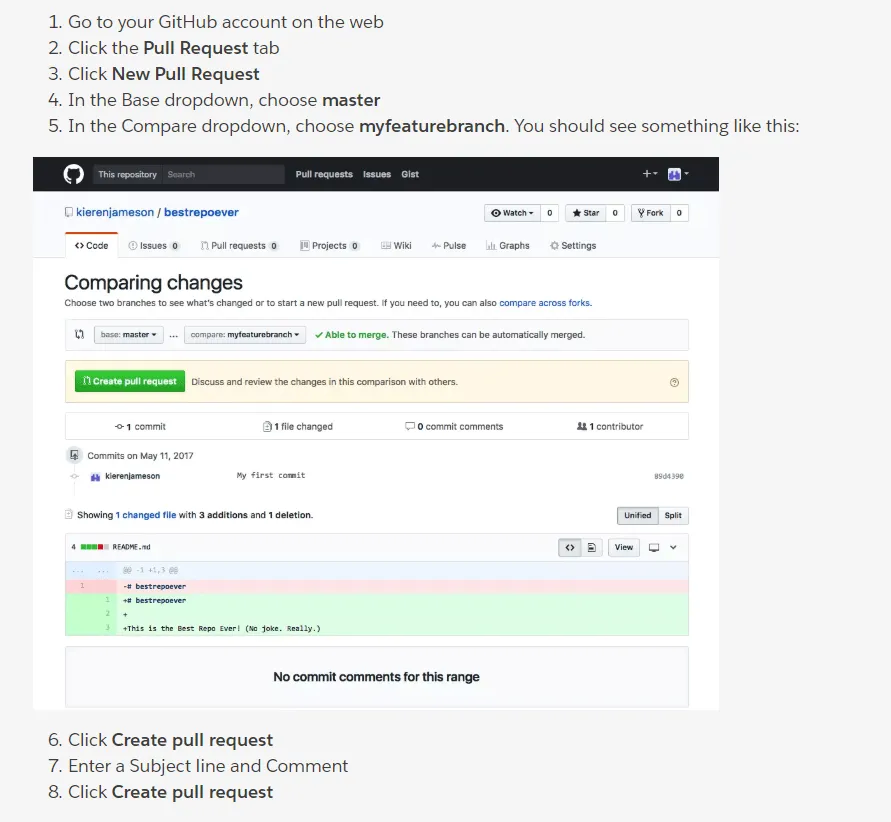
Step 4: Create a Pull Request
Now that you’ve pushed your changes to your remote repository, let’s open a pull request on GitHub.
Control Code Quality with Code Review
- General Conversation – Use the Conversation tab to add general comments on a pull request.
- Line Comments – These line level comments are a great way to give additional context on recommended changes. They will also be displayed in the conversation view.
- Review – When you are making line comments, you can also choose to Start a Review (D). When you create a review, you can group many line comments together with a summary message. When you submit the review, you can indicate whether it is just a comment, an approval, or a request for changes.
- Automated Tests – If you’ve integrated CI/CD with your project, you will see the status of your tests reported right on the pull request. These tests are highly customizable.
Merge Your Changes
When you merge your branch, you take the content and history from your feature branch and add it the content and history of the master branch.
Keeping It All In Sync
- After your merge your pull request, delete the branch of GitHub.
However, merging and deleting on GitHub will not automatically update your local copy of the repository.
First, we need to get the changes we made on GitHub into our local copy of the repository.

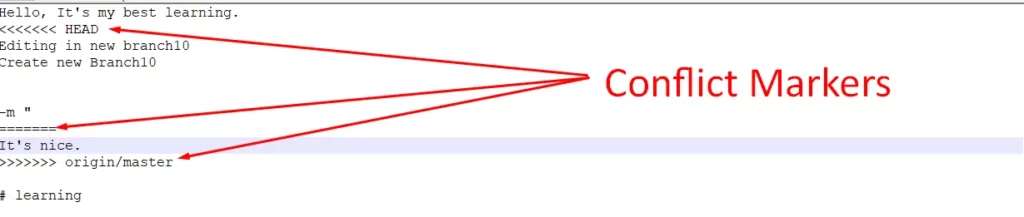
Handle Merge Conflicts
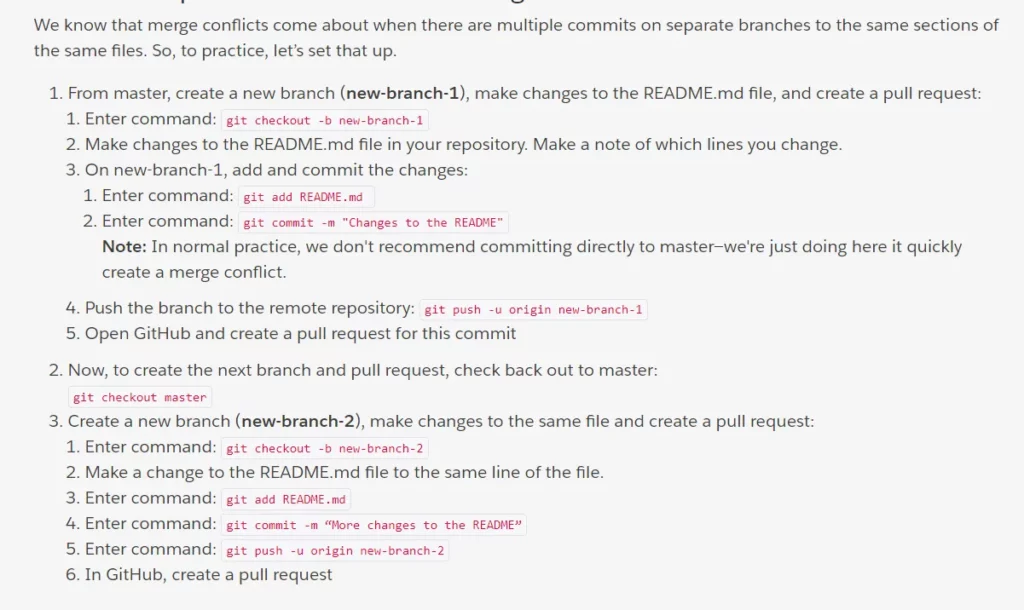
When your work with team, you’ll occasionally create merge conflicts.
Let’s try to create a merge conflict, and see what happens.
Create Multiple Branches with Conflicting Commits
Merge One Pull Request
So far, there’s no merge conflict showing in either branch. In GitHub, merge your first pull request (from new-branch-1)
Resolve the Conflict on the Other Branch

Work with Your History in Git
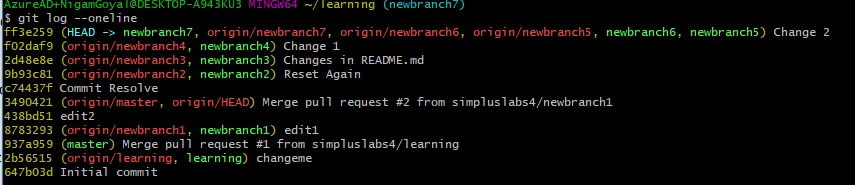
Git log: while working on your project it can be helpful to review your commit history. It enables you to display a list of all of the commits on your current branch. By default, It presents a lot of information all at once.
- Git log -10: It will show 10 most recent commits.
- Git log –oneline: It is a great way to view commit history by displaying the first seven characters of SHA-1 hash and commit message of the commits on the current branch.
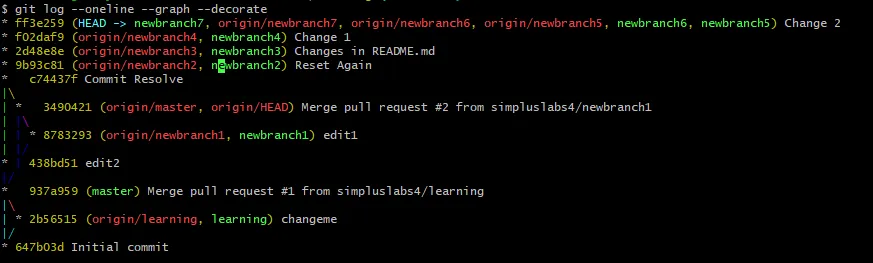
- Git log —oneline –graph: It presents commit history in an ASCII graph displaying the different branches in the repository and their commits.
- Git log —oneline –graph –decorate: It also includes the branch name(s) for the different commits being displayed.
Compare Versions of Files
- git diff: It is used to compare between any two commits, branches, or tags in the repository. How to use: git diff<SHA-1 : Ref 1> <SHA-1 : Ref 2>
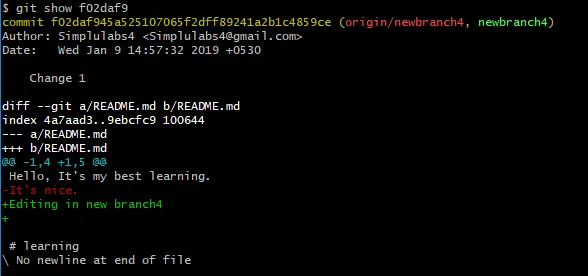
- git show <SHA-1> : It command to display the details of that specific commit.

Undo a Previous Change
- git revert: It creates a new commit with changes that are the opposite of the commit that is functionally being ‘undone’.
Amending Commits
- git commit –amend: It is to rewrite the most recent commit to include files in your staging area.
Rewind to an Earlier Point in History
- git reset: It can help rewind the history of our project.
- git reset –soft: takes the identified commit(s) and places all of the changes in the staging area.
- git reset –mixed: the default mode for git reset, takes the identified commit(s) and places all of the changes in the working directory
- git reset –hard: will take the identified commit(s) and destroy them.