

Before Starting the code, let understand some basic concepts:-
Decorators
Lightning Web Components has three decorators that add functionality to a property or function.
The ability to create decorators is part of ECMAScript, but these three decorators are unique to Lightning Web Components.
- @track – To track a private property’s value and
rerender a component when it changes, decorate the property with @track. Tracked properties are also called private reactive properties. - @api – To expose a public property, decorate it with @api. Public properties define the API for a component. An owner component that uses the component in its markup can access the component’s public properties. Public properties are reactive. If the value of
a reactive property changes, the component’s template rerenders any content that references the property. - @wire – To read Salesforce data, Lightning web components use a reactive wire service. When the wire service provisions data, the component rerenders. Components use @wire in their JavaScript class to specify a wire adaptor or an Apex method.
How to create the record in Lightning Web Component without using Apex.
Apex is no longer necessary to create the record in Salesforce Database because of the alternatives for working with data in Lightning Web Component.
You can create the record in LWC by using:-
- lightning-record-form
- lightning-record-edit-form
- JavaScript API Method “createRecord”
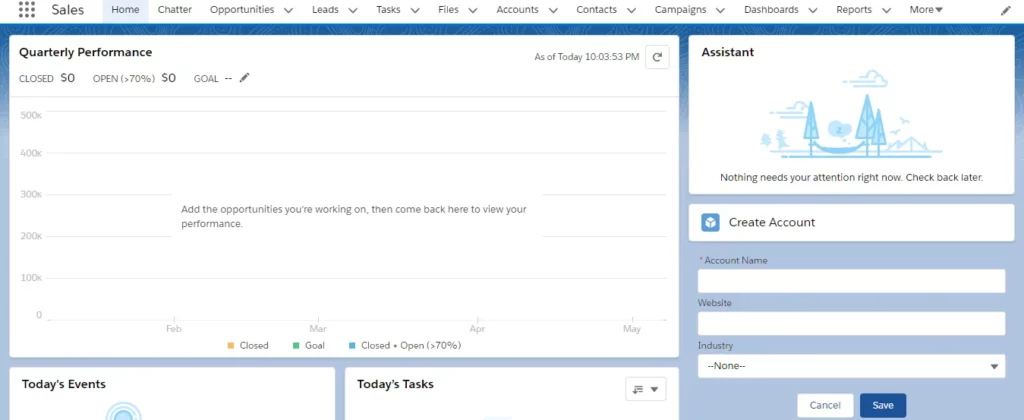
Let’s see how you can create the record by using “lightning-record-form”
- First, we create Lighting Web Component with name “createAccountRecord”, click this link on how to create Lightning Web Component.
- Then, put this code into createAccountRecord.html.
Here, In object-api-name, you pass objectName and in fields,you pass objectFields.
- Next, put this code into createAccountRecord.js.
Here, we import Account objectName and three AccountFields(Name, Website, Industry).
- Next, put this code into createAccountRecord.js-meta.xml. To access the component into Lightning App Page, Lightning Record Page, Lightning Home Page.
- After that, deploy your code into Developer Org. How to deploy code into Org. Click this link on how to deploy your code.
- Finally, Here is you create the record.
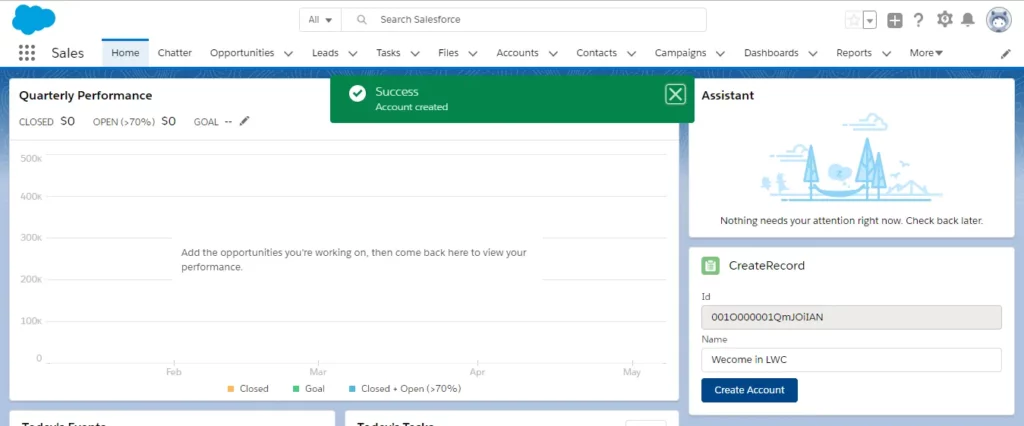
Now, you can create the record using JavaScript API Method “createRecord”
- First, we create lighting web component with name “createRecord”, click this link on how to create Lightning Web Component.
- Then, put this code into createRecord.html.
Here, we set two actions “onNameChange” at lightning-input and “createAccount” at lightning-button click to create the record.
- Next, put this code into createRecord.js.
Here, we import Account objectName and one AccountField(Name). And also Import {createRecord} from ‘lightning/uiRecrodApi’.
Use “@track” to track a private property’s value and re-render a component when it changes.
At “onNameChange” we set the lightning-input value. And at “createAccount”, we set the objectApiName and objectFields in recordInput Object.
After that, pass the recordInput Object to createRecord.If the record is created, “.then” is performed and we set accountId is equal to account.Id.If the record is not created, then we get the error.
- Next, put this code into createRecord.js-meta.xml. To access the component into Lightning App Page, Lightning Record Page, Lightning Home Page.
- After that, deploy your code into Developer Org. How to deploy your code into Org. Click this link on how to deploy your code.
- Finally, Here is you create the record.
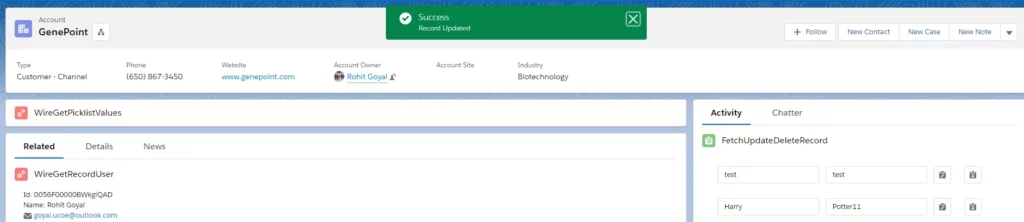
How to fetch, update and delete the records in Lightning Web Components?
Step 1) First, we create the Lightning Web Component with name “fetchUpdateDeleteRecord”, click this link on how to create Lightning Web Component. And Create ApexController with name “AccountController”
- Put this code into fetchUpdateDeleteRecord.html.
Here we add three actions, “onNameChange” at lightning-input, “updateAccount” at lightning-button-icon to update the record and “deleteAccount” at lightning-button-icon to delete the record.
You can also see that we used key= objectId. It is necessary to display the record at DOM.
- Put this code into fetchUpdateDeleteRecord.js.
Here, we import the { updateRecord },{ deleteRecord } to perform the update and delete operation. So, you do not need Apex in LWC to perform the create, update and delete operation.
import {refreshApex} to perform the refresh operation at apex queries. And also import ‘getAccountRecordWithRelatedContactList‘ method from AccountController class to fetch the record.
Here is the code of
Use “@track” to track a private property’s value and re-render a component when it changes.
Fetch the record
Use “@wire” service to fetch the record from Salesforce Data.
1. Do not use “@wire” service to create, update and delete data. Pass getAccountList in “@wire” to fetch the record. Here, wiredContacts is just a name. You give any name.
- Do not use “@wire” service to create, update and delete data.
- Pass method as a first argument in “@wire”. For ex : we pass “getAccountRecordWithRelatedContactList” method.
- And in
second argument, we pass object recordId and fields.For ex : Here, we pass Account recordId to fetch the child Contact records.
Update the record
Next, we perform updateAccount event to update the record.
First, we get the record Id which we set at data-
Then recordInput pass into updateRecord to perform the update operation. If the record is updated, “.then” promise function will be performed else we will get the error.
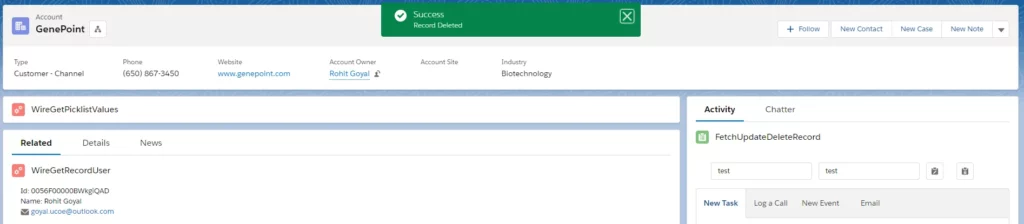
Delete the Record
Next, we perform deleteAccount event to delete the record.
First, we get the record Id which we set at data-recordid in lightning-button. Then recordId pass into deleteRecord to perform delete operation.If the record is deleted, “.then” promise function will be performed else we will get the error.
- Put this code into fetchUpdateDeleteRecord.js-meta.xml. To access the component into Lightning App Page, Lightning Record Page, Lightning Home Page.
- After that, deploy your code into Developer Org. How to deploy your code into Org. Click this link on how to deploy your code.
- Finally, here is update or delete operation performed. After performing delete operation, “harry potter” record does not see.

Hi Nijam,
Can you please help , how update the Status if a Case to Close using Lightning Web Component through a Button.
Thanks,
Kiran
Hi Nigam,
I got this error when I am deploying to org “No MODULE named markup://c:IdsUtils” . Can you post your IdsUtils LWC
thanks for post this blog it really helped me.
Awesome Article.It helped me to a lot.Thank you for your good work.
ldsUtils Class is missed