

Salesforce offers the feature of Salesforce Territory Forecasting which revolutionizes sales planning and resource allocation. By leveraging advanced analytics and data-driven insights, it enables organizations to optimize sales territories for maximum revenue generation. With accurate forecasts, sales teams can align their strategies, assign quotas, and make informed decisions to drive growth and achieve sales targets.
Let us look at few terms that are important to understand to move forward:
- The Quota is referred to as the selling target given to a sales team or individual sales rep.
- Quota Attainment is the metric that measures the performance of sales teams and individual sales reps by tracking how well they meet their selling targets, expressed as a percentage of the total quota achieved.
- Territory Forecast is the process of predicting and estimating future sales performance within specific sales territories or regions.
We need to ensure a few things before we start setting up the territory forecast. Follow the three processes below. These steps can be skipped if these options have already been enabled.
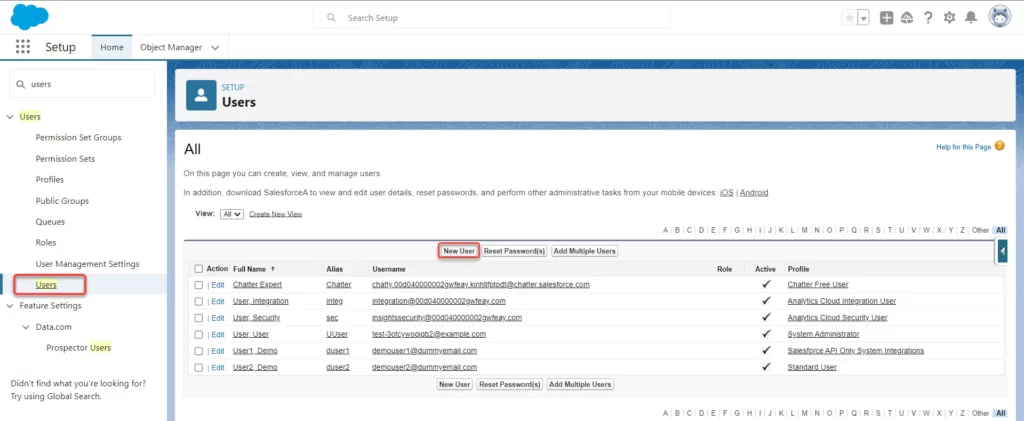
Add Users
The Salesforce Org needs to have the users which will be assigned to the territories. If the Salesforce Org already had all the required users, this step can be skipped. Otherwise configure a new user by navigating to: Setup → Users → Users → New User or refer to this document to Add a Single User.
After creating the users, we would need to allow the Forecasting for each and every user we want to add to the forecast.
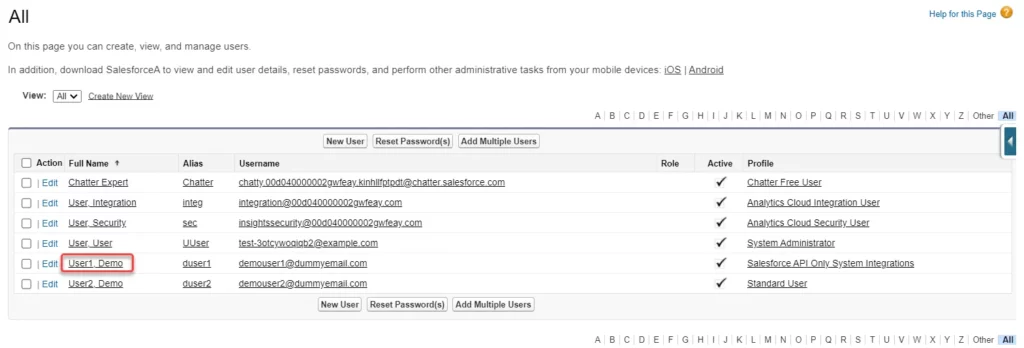
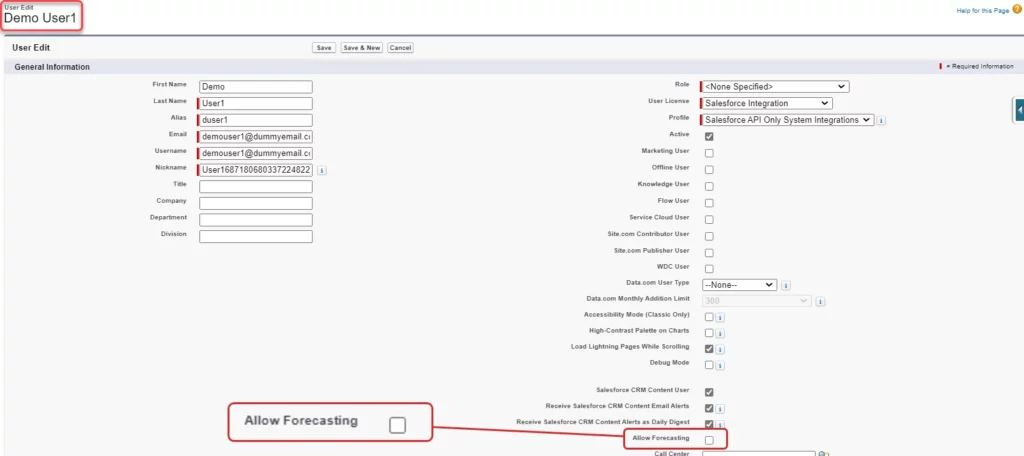
To do that, click on the user’s Full Name. It will redirect to the User Detail page. On the User Detail page, Allow Forecasting checkbox can be found.
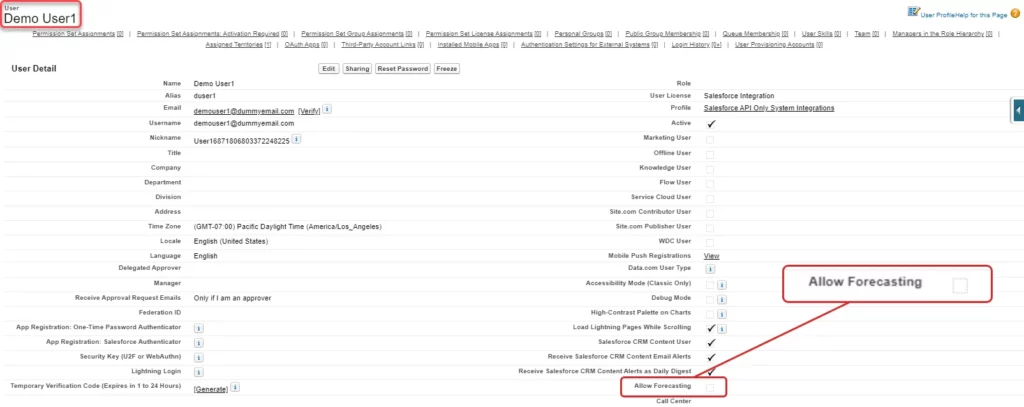
If the Allow Forecasting checkbox is marked Check, we would skip this step. If the Allow Forecasting checkbox is marked Uncheck, we would edit the User Details by clicking on the Edit button.
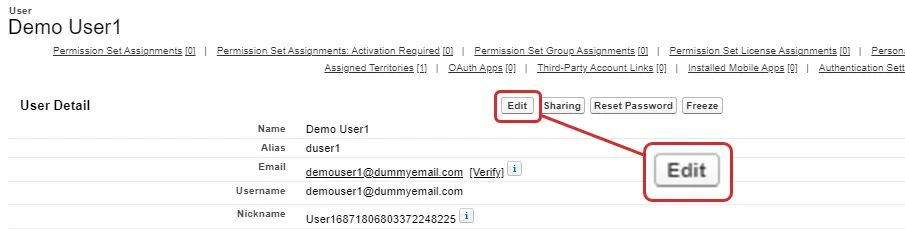
Clicking on the Edit button will navigate to the page edit form. The Allow Forecasting checkbox can be marked Check here.
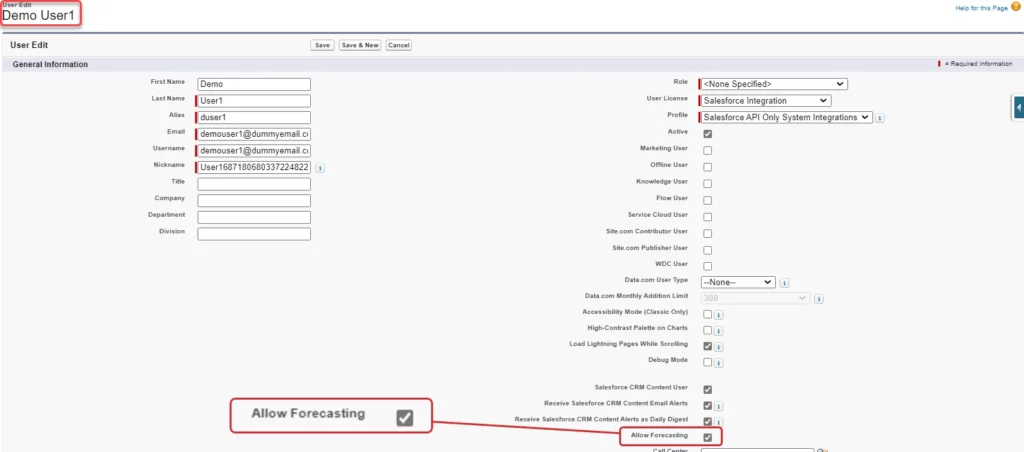
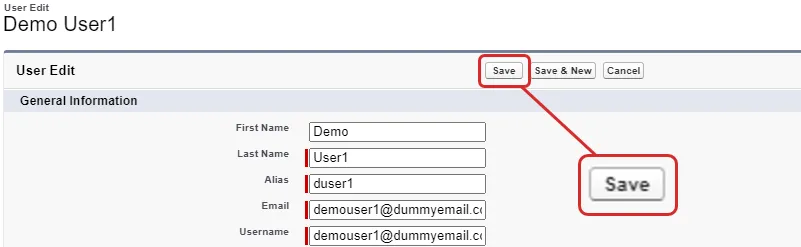
Save the configuration by clicking on the Save button.
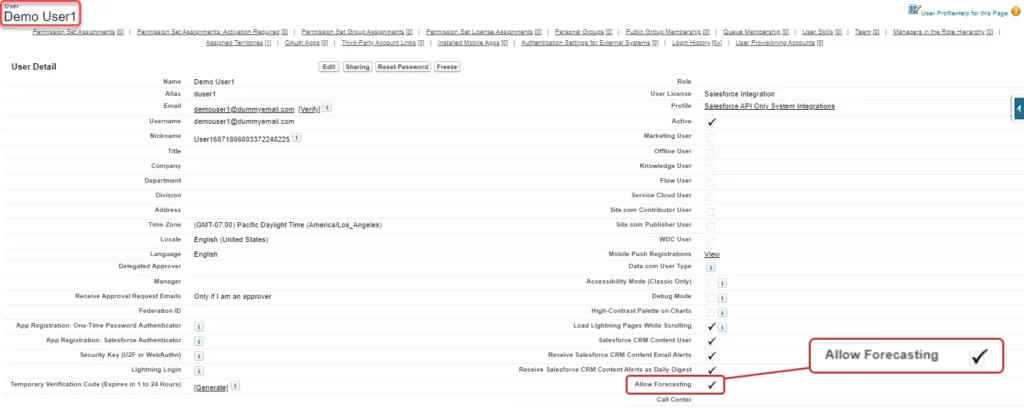
It can be observed in the screenshot above that the Forecasting has been allowed for the user.
Enable Forecasting
To set up any kind of forecast in the Salesforce Org, the Forecasting need to be enabled. It can be enabled by navigating to: Platform Tools → Feature Settings → Sales → Forecasts → Forecast Settings
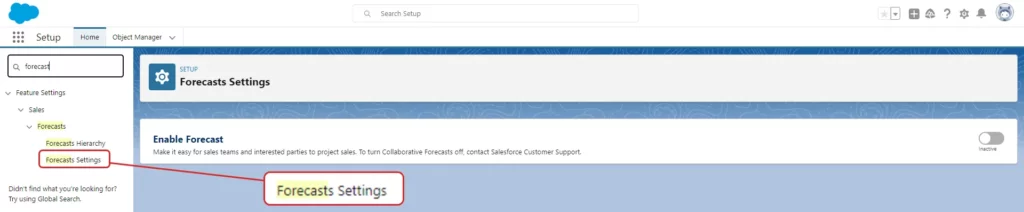
If this option has never been used, there will only be single option available on this page: Enable Forecast
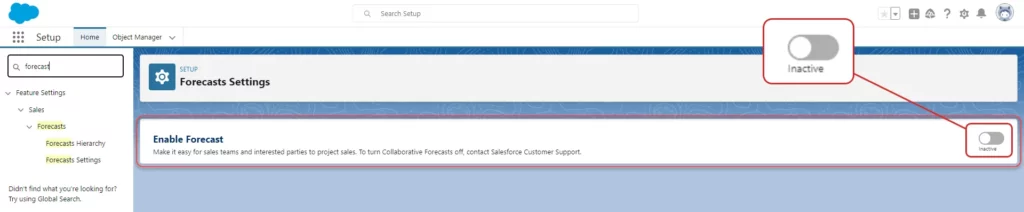
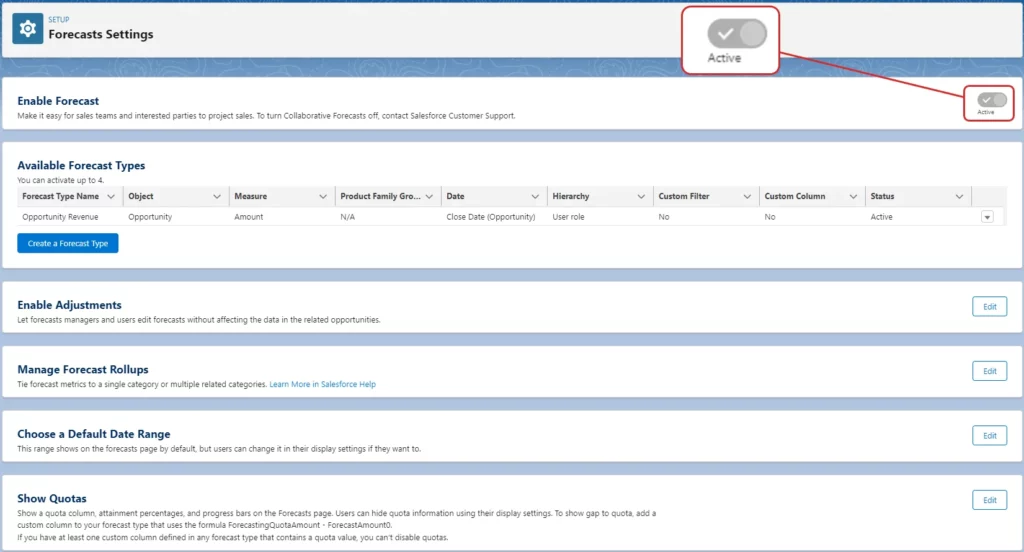
- Once this option has been enabled, it cannot be disabled. when enabled, all the other sections appear on this page for configuration.
Enable Territory Management
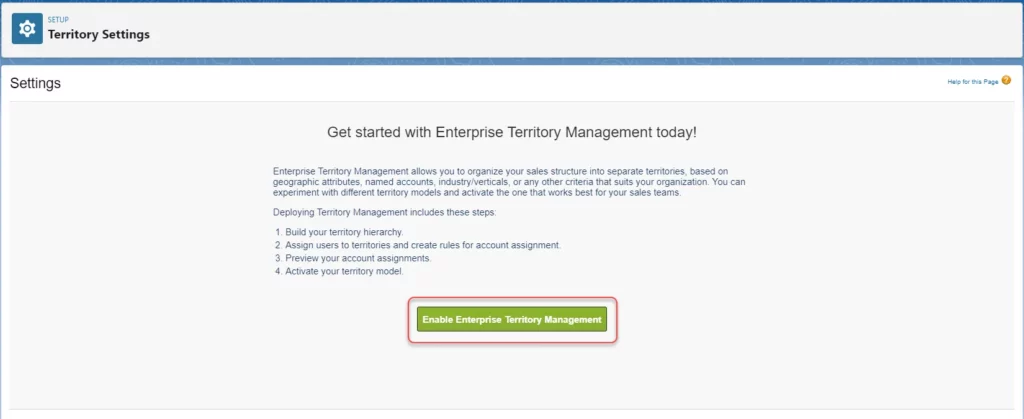
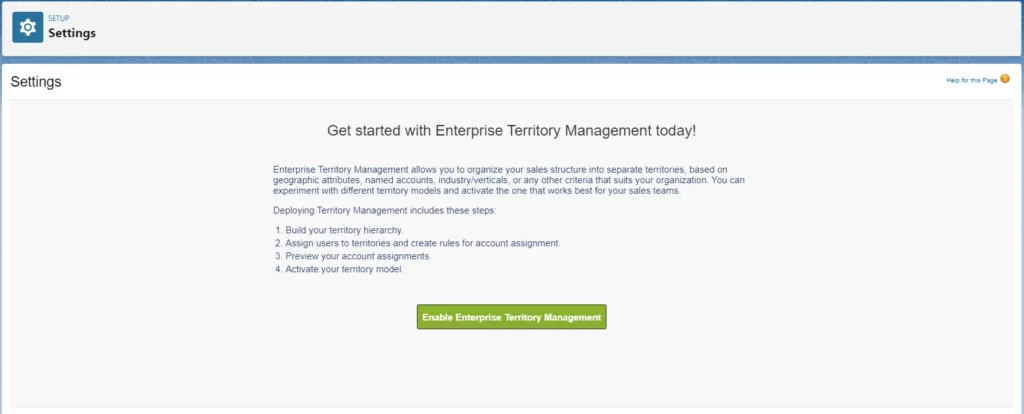
We also need to enable the Territory Setting, to configure and user the Salesforce Territory Forecasting in our Salesforce Org. It can be enabled by navigating to: Platform Tools → Feature Settings → Sales → Territories → Territory Settings
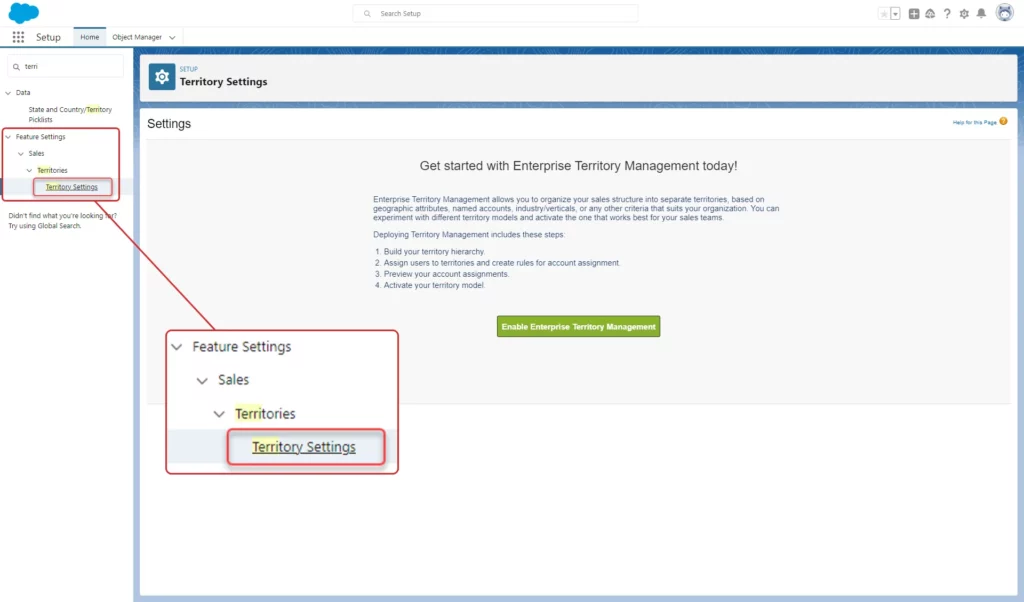
Here, enable the Territory Forecast by clicking on Enable Enterprise Territory Management button that is available in green in the center of the screen.
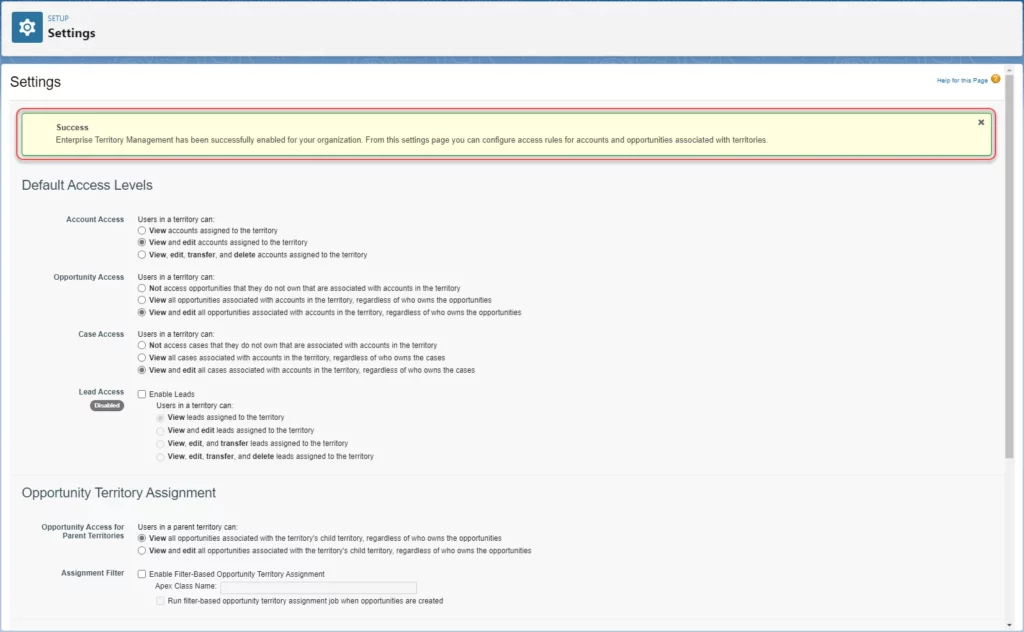
- Once enabled, a Success message will appear on the top of the Settings page. When enabled, all the Territory settings will be made visible on the page.
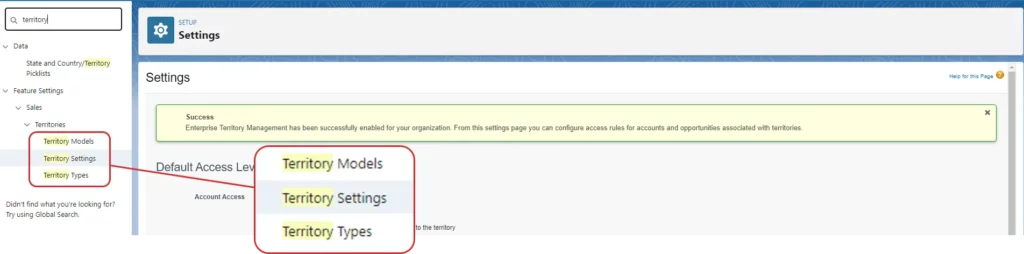
When the Territory Settings are enabled, two new pages are made visible on the UI: Territory Models and Territory Types.
Setup
Once we have completed the above steps, we can begin with actually creating the Salesforce Territory Forecasting. Previous steps were important in order to have a normal functioning of the Salesforce Territory Forecasting. Moving forward, we will configure multiple different options. That together will allow for Salesforce Territory Forecasting.
Step 1: Choose Territory Type:
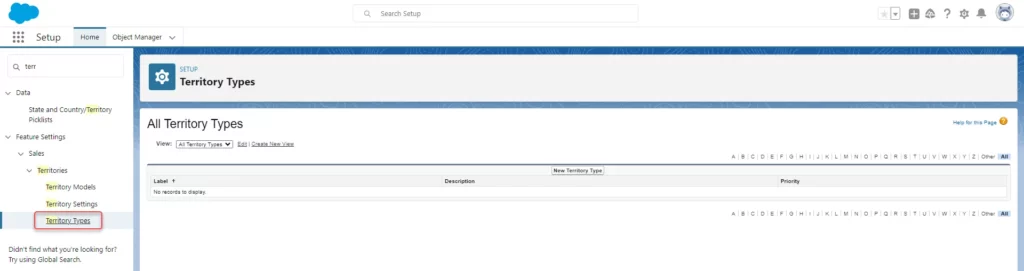
We require a Territory Type to use in the territory hierarchy. We can either create a new Territory Type or choose one from the existing Territory Types. To create a new Territory Type, Navigate to path: Platform Tools → Feature Settings → Sales → Territories → Territory Types
On the Territory Types page, create a new type by clicking on the New Territory Type button.

It’ll open a new page where we can set the Label, Territory Type Name, and Priority for the territory type.
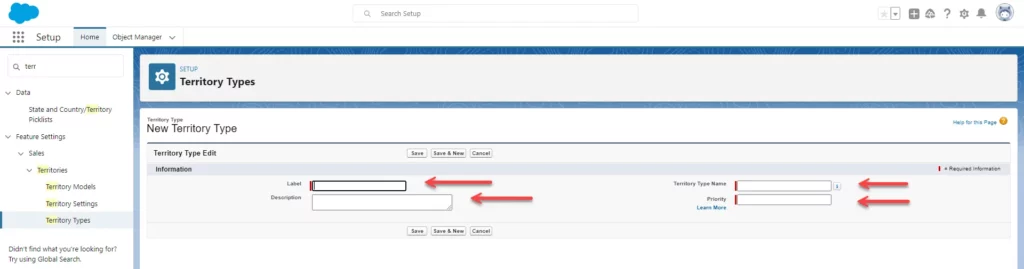
The Territory Type Name is the API name. This field will be auto populated with the same value as the Label field, with spaces replaced with an underscore. Higher Priority will be given to the higher number. The Description is an optional field.

Once values are put in the fields, click on the Save button to save the territory type.


Below is the demo of Territory Types created.

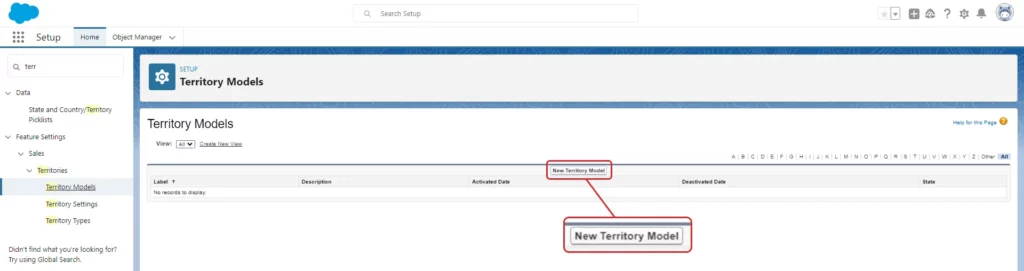
Step 2: Choose Territory Model:
Territory Model defines how a company’s sales territory are structured and organized. User can create multiple territory models but only one territory model can be active in the org at a time. Navigating to Territory Models page: Platform Tools → Feature Settings → Sales → Territories → Territory Models
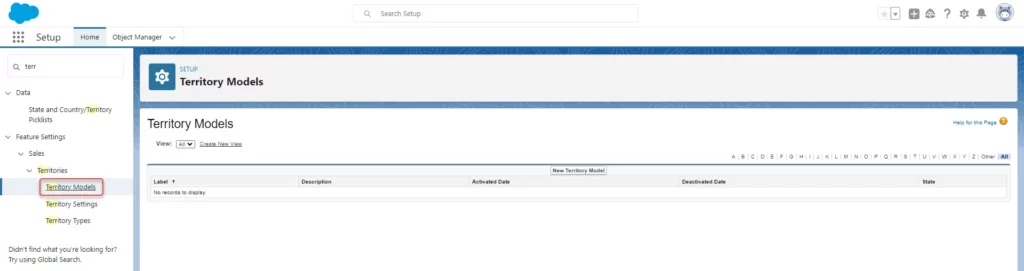
On this page, create a new model by clicking on the New Territory Model.
You will be navigated to a new page where we can set the Label & Territory Model Name for the territory model. The Territory Model Name is the API name. This field will be auto populated with the same value as the Label field, with spaces replaced with an underscore. The Description is an optional field.

Once done, click on the Save button to save the configuration for the model.

Once the Territory Model is created, it is set to Planning State by default.

Step 3: States of Territory Model:
Every Territory Model has three states: Planning, Active, and Archive. Moving through these States of the Territory Model is an irreversible process. Only one Territory Model is allowed to be Active at one time.
To use the model, it needs to be moved from the Planning to the Active state. Move the model to Archive state to deactivate it. Keep a model in the Planning state for use in the future. Keep a model in the archived state for future reference. When a Territory Model is created, it is put into the Planning State.

We will have to manually Activate the model. Once a model has been Activated, it can’t be moved back to the Planning state. Click on the Activate button to initiate the activation.

A pop-up will appear displaying the warning that this action is irreversible. Click on Activate button to change the state of the model to Active.
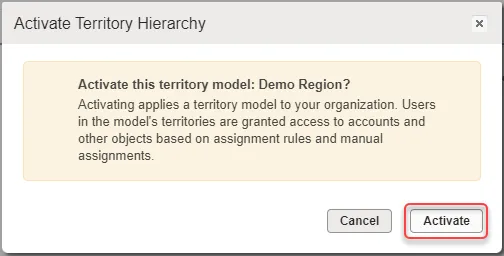
Once the model is Activated, a message will appear saying that it might take some time to come into effect. And the Activate button is greyed out.
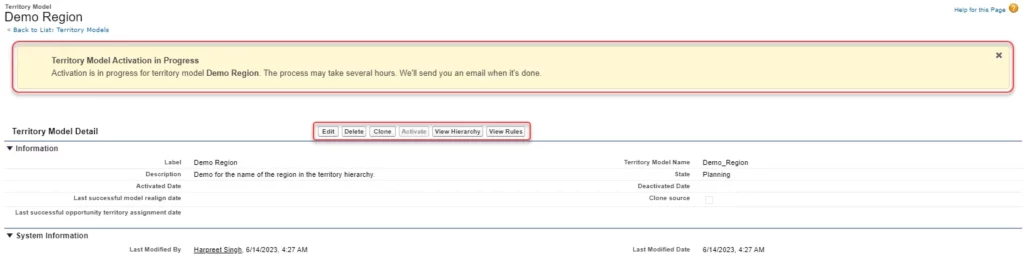
After some time, the state of the model will be changed to Active.

Similarly, the territory model can also be archived when not in use. Every Model has a Hierarchy and Rules.

Step 4: Creating Model Hierarchy:
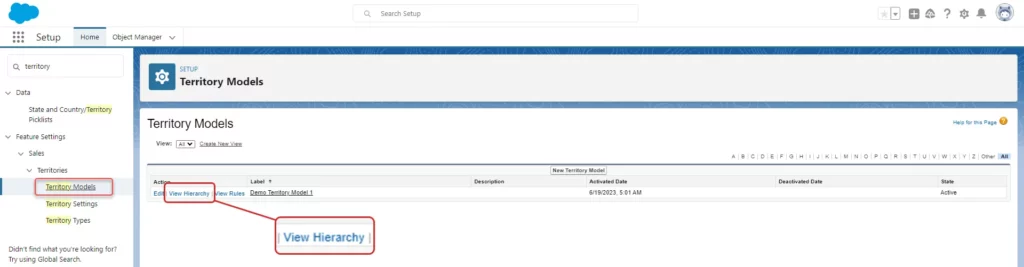
After creating a Hierarchy Model, we need to create a hierarchy for it. Without creating the hierarchy, we can’t assign users for quota. It can be done from the View Hierarchy button available to the left of the Territory Model. It is used to View, Create, Modify, or Delete the hierarchy of the territory model.

Clicking on the button will redirect to a new page, where the hierarchy is listed. Here, Collapse All and Expand All buttons are used to collapse and expand the whole list with a single click.
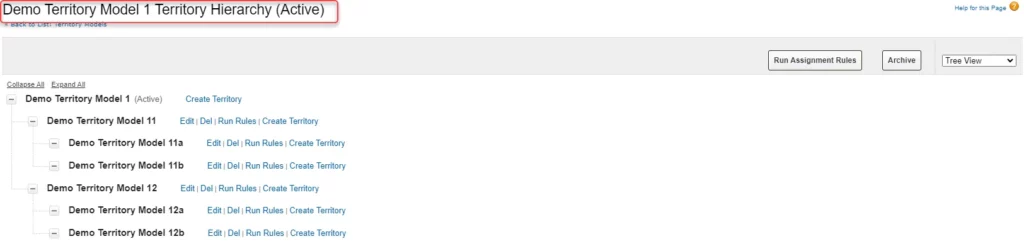
Create Territory button is available to the right of each territory. It is used to create the levels inside the particular territory.
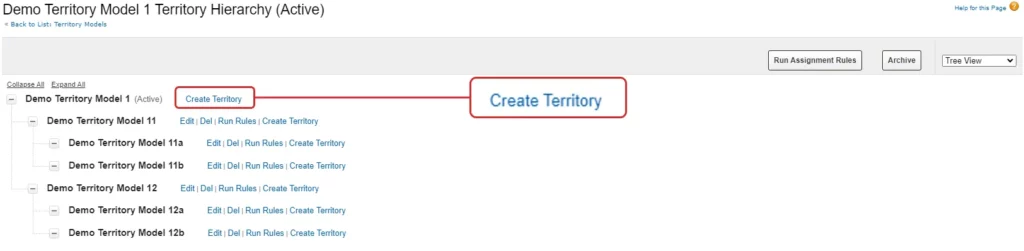
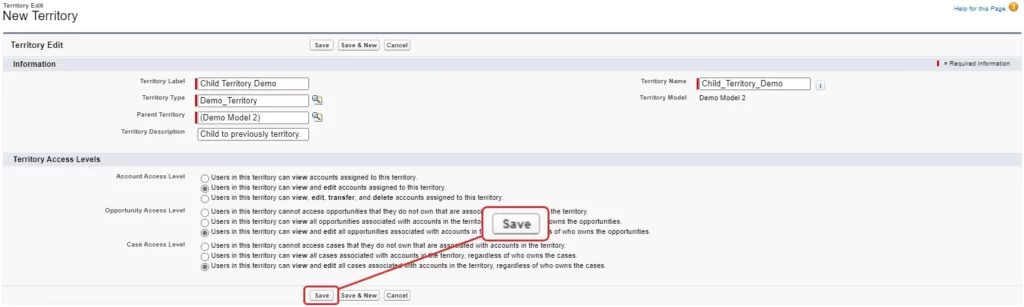
Clicking on the Create Territory button will open a new page where we can configure the new territory.
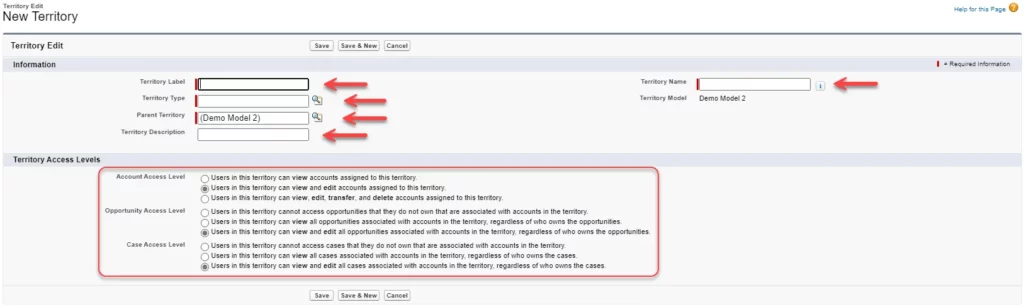
Territory Label needs to be set by the user. Territory Name is auto populated with the same value as Label, with spaces being replaced with an underscore. Territory Type and Parent Territory are two lookup fields, where we can select the parent and type for the current territory. By default, Parent Territory is auto populated by the territory, for which the Create New Territory button was clicked. But we can always change this field to move the territory from one parentship to another. We can also set the Territory Access Levels for the current territory.
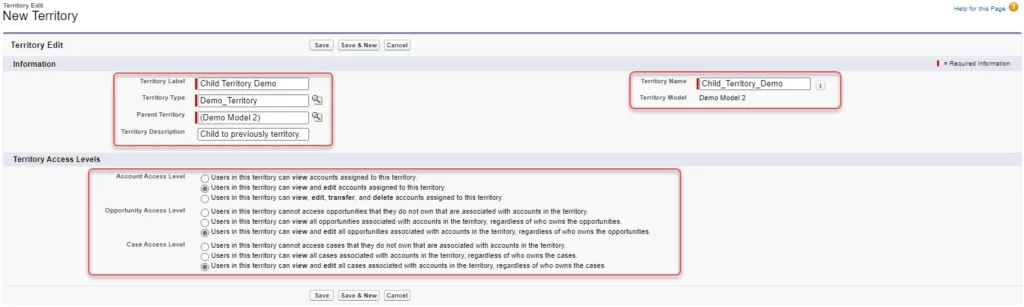
On typing the details for the Territory, click on the Save button to create the Territory.
STep 5: Assign Users to a Territory:
We allowed the Forecasting for the users in the earlier step for this particular step. Now we can move ahead with assigning users to the territory. All the users with Forecasting enabled will appear in the list to assign to territories. Navigate to the Territory Models → [Name of the model] →View Hierarchy
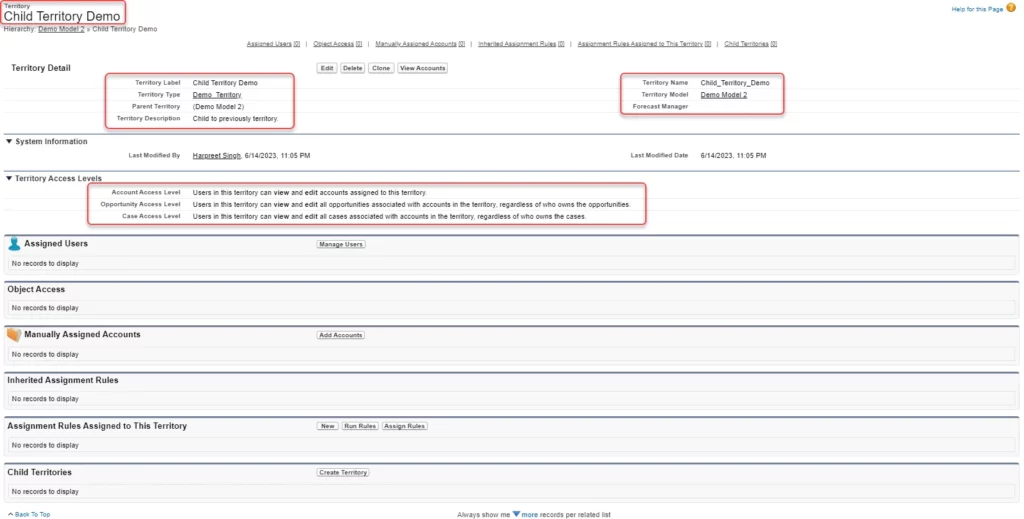
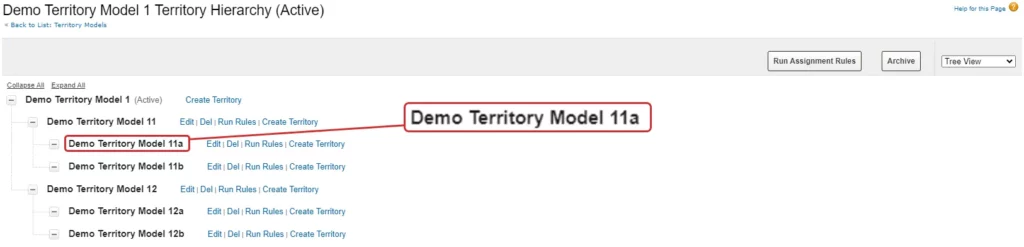
In the Territory Hierarchy, click on the name of the territory to open the details of the specific territory.
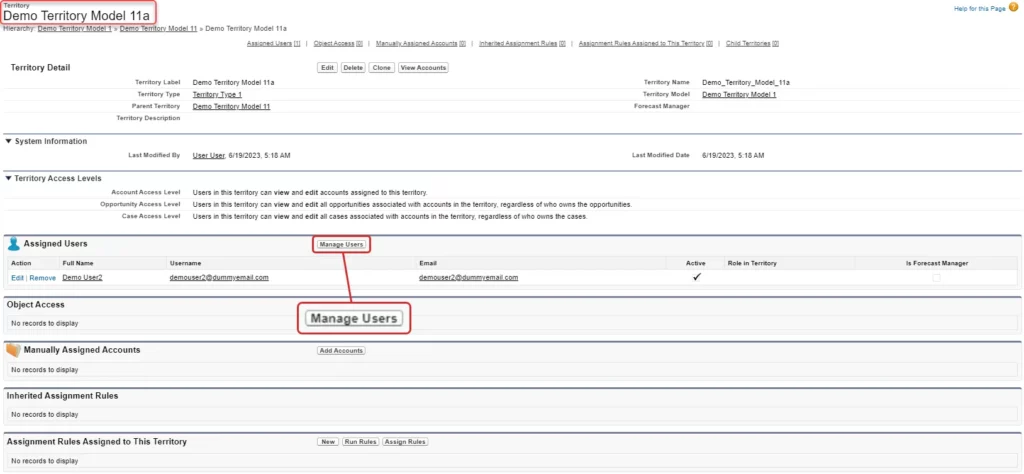
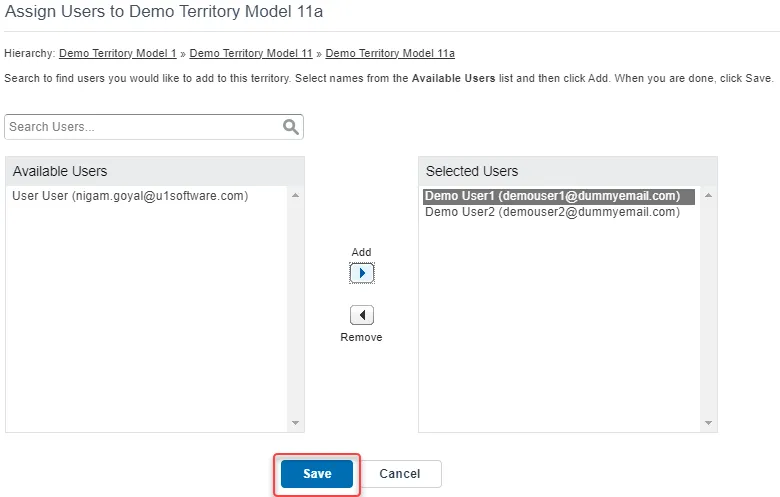
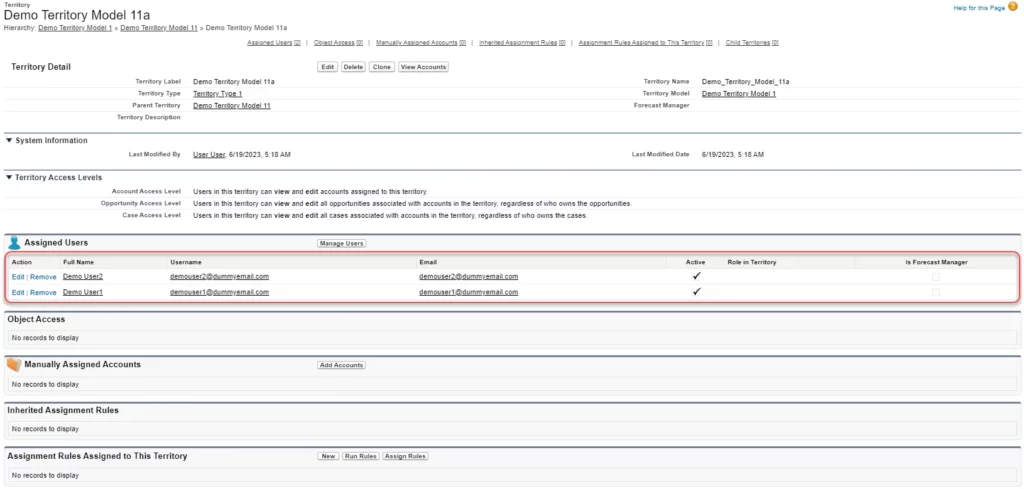
On the Territory Detail page, find the Assigned Users section and click on the Manage Users button to add the users to the particular territory.
On clicking the Manage User button, you will be navigated to a new page where you can select users for the particular territory. Use the Add and Remove buttons to add the users from Available Users list to the Selected Users list.
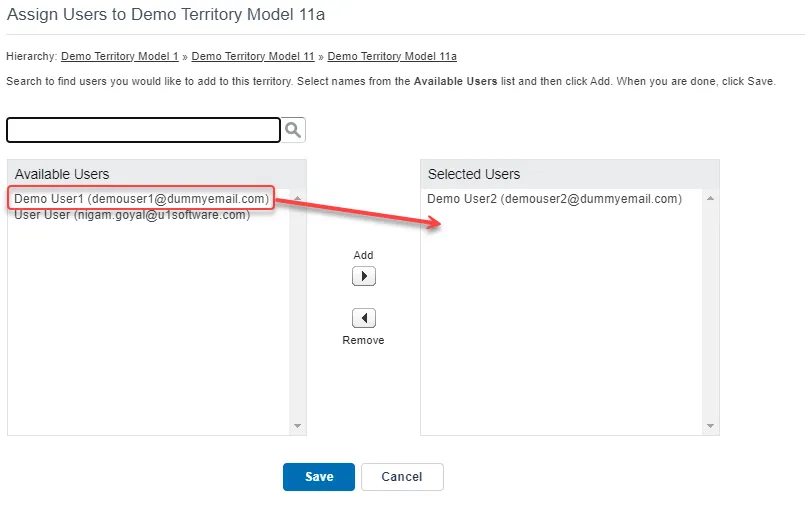
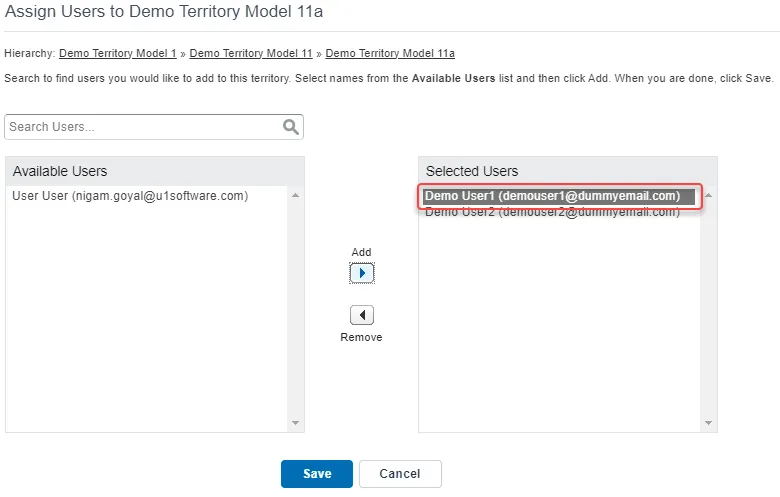
Click on the Save button to save the selected users.
Step 6: Setting a Forecast Manager for Territory:
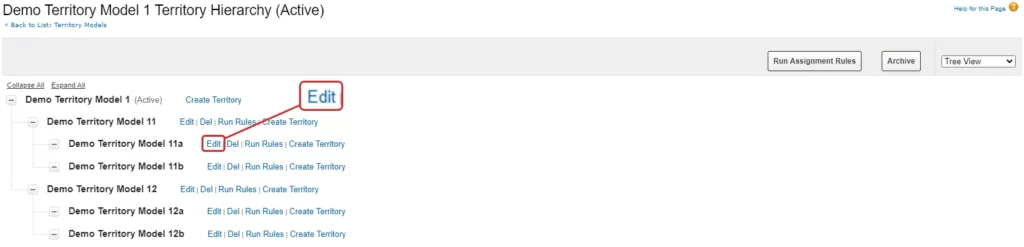
Forecast Manager is responsible for overseeing and facilitating the forecasting activities of sales team. Every territory needs a forecast manager. Forecast Manager can be selected among the users assigned to a territory. The Forecast Manager can be set for each Territory by editing the specific territory. Click on Edit button to edit the territory.
On the Territory Edit page, find the Forecast Manager lookup field to select a manager for the specific territory.
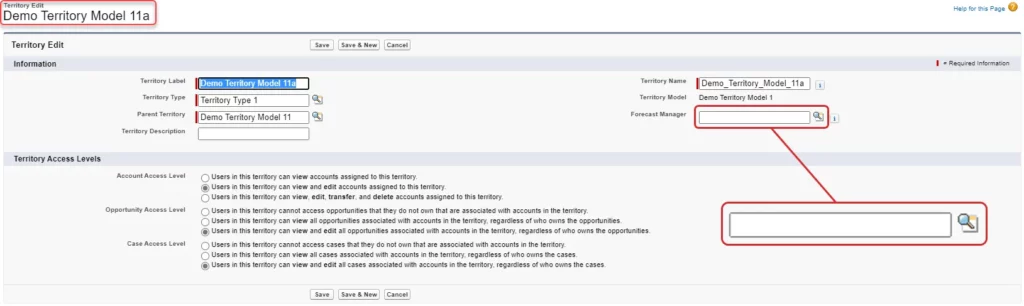
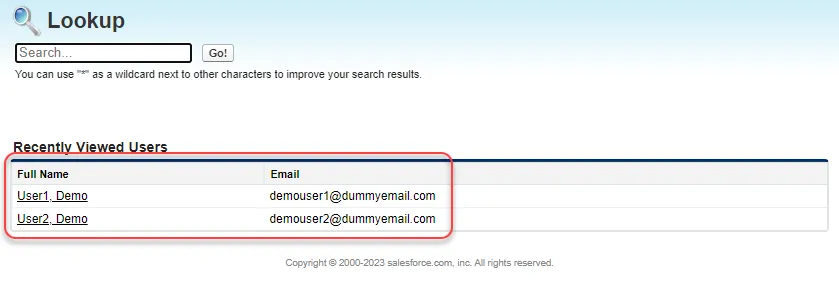
Clicking on the Forecast Manager look-up field opens a pop-up window with list of all the users assigned to that particular territory. Select a user among the listed assigned users.
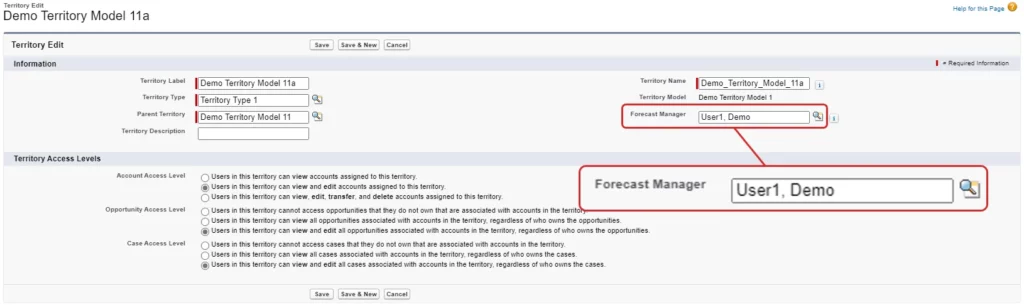
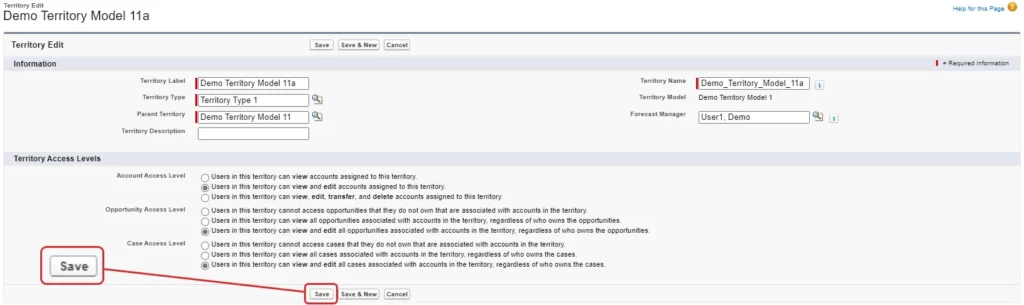
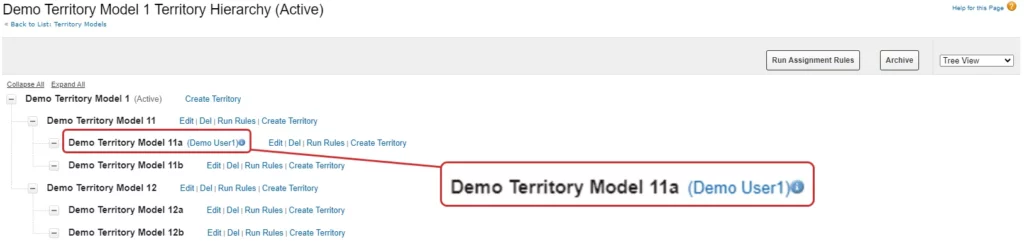
After selecting the Forecast Manager, click on the Save button to save the manager for the territory. The Manager Name will be visible alongside the territory name.
Step 7: Choose Forecast Type:
To display the forecast, we need to create a forecast type, which would be different from Territory Type that we created earlier. We can create multiple Forecasts but only 4 can be enabled at the same time. To create a Forecast Type, Navigate to: Platform Tools → Feature Settings → Sales → Forecasts → Forecast Settings
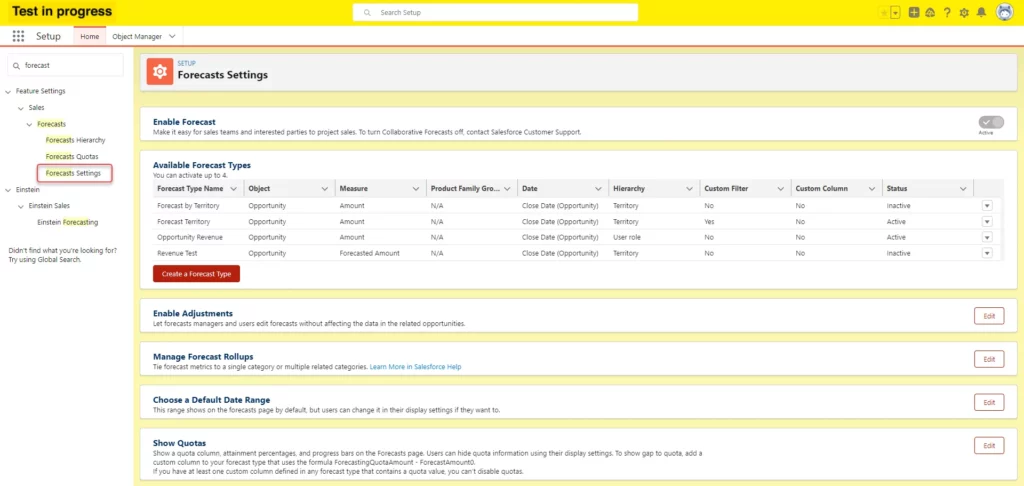
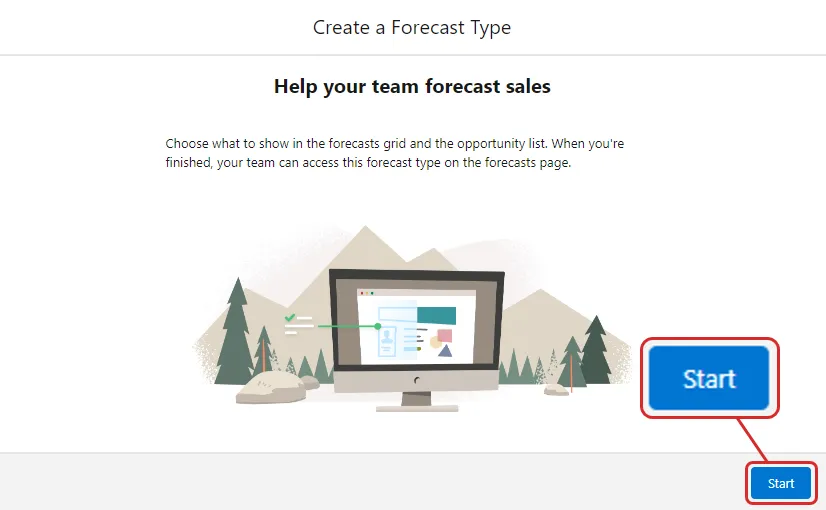
We can control various settings for the Forecast from this page, like creating an entirely new forecast. Click on the Create a Forecast Type button to start with the process of creating the forecast.

Clicking on the Create a Forecast Type button will open a new pop-up window which will present us with options for creating a forecast. Click on the Start button.
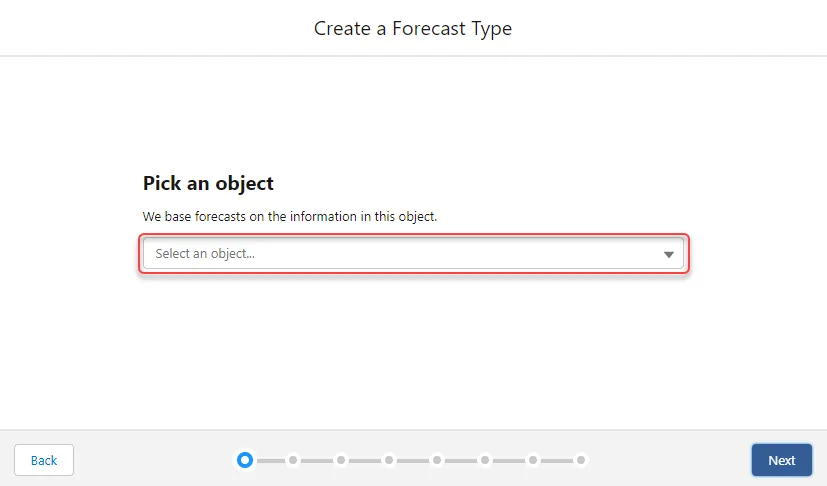
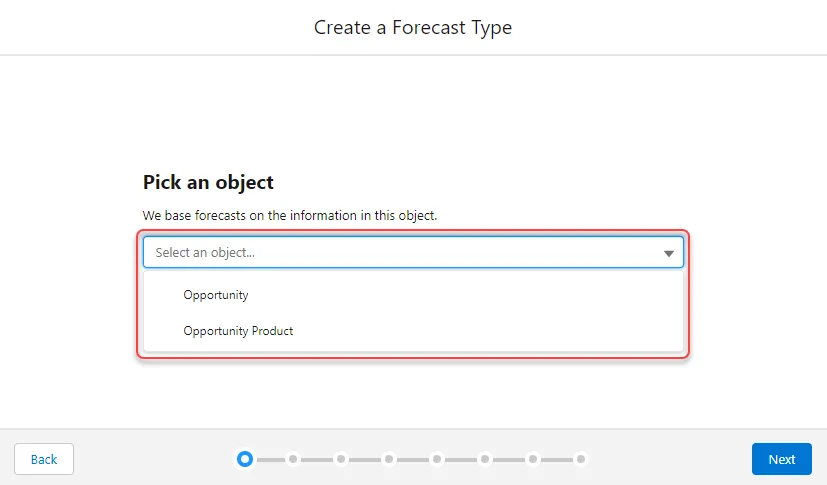
In the next window, Select an Object on which we want to create the Forecast. We are selecting Opportunity for the example’s sake.
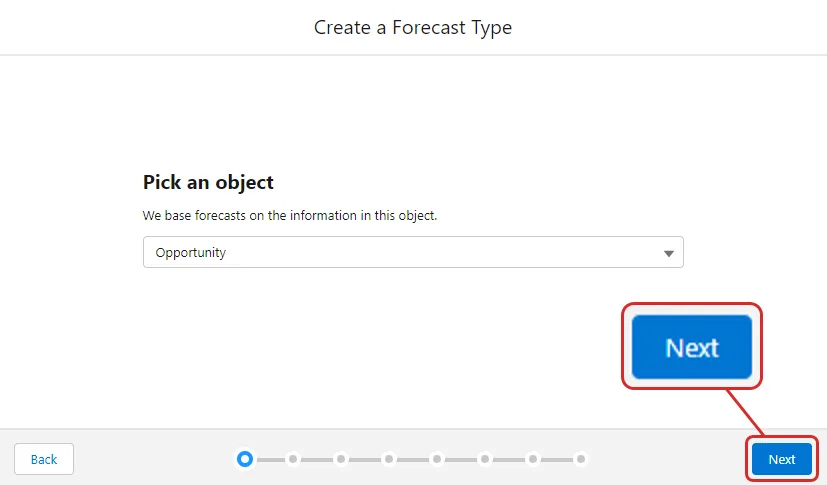
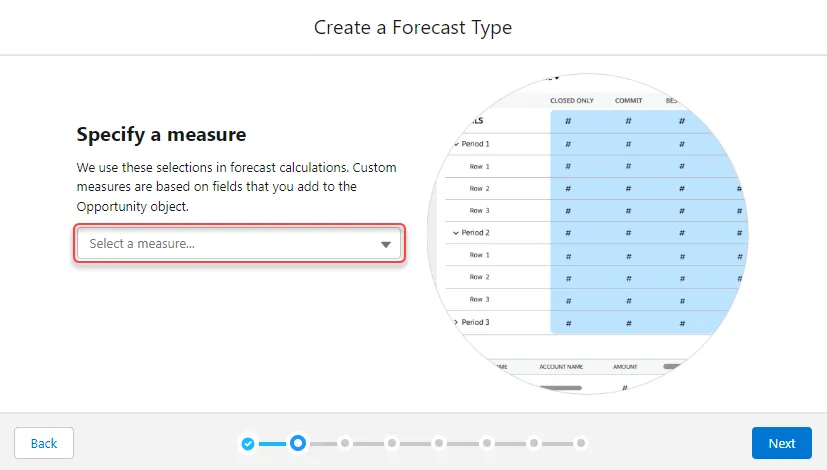
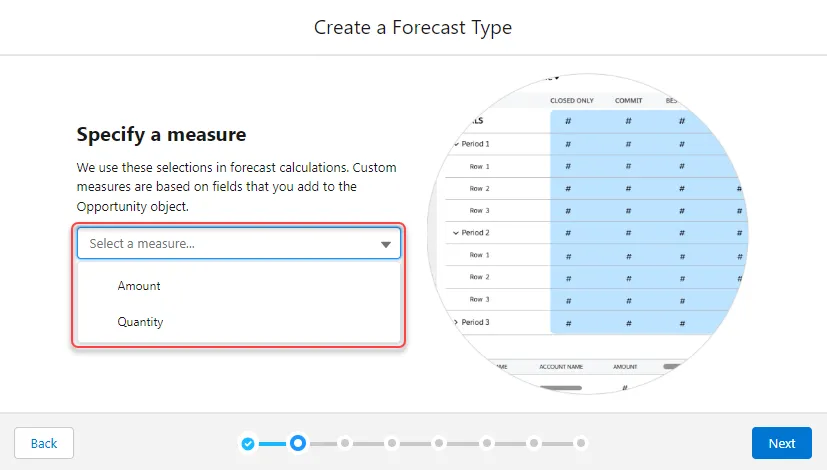
After selecting the Object, click on the Next button. On the next window, Select a Measure for the forecast calculations. For example, we will select Account.
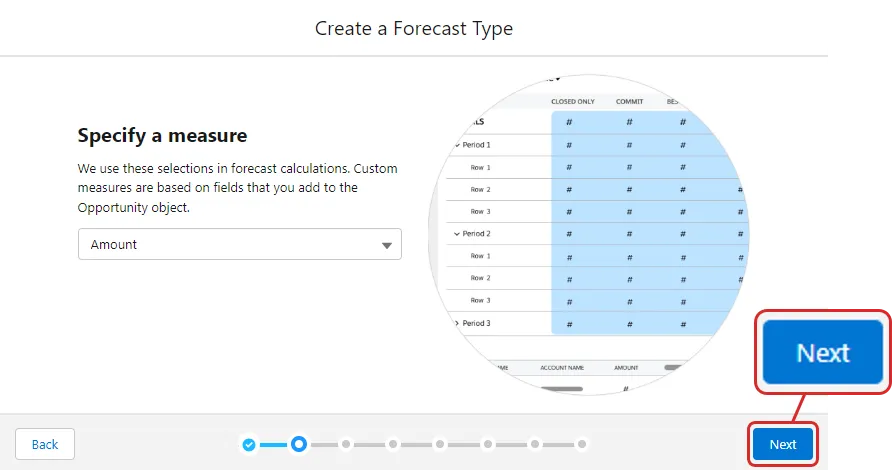
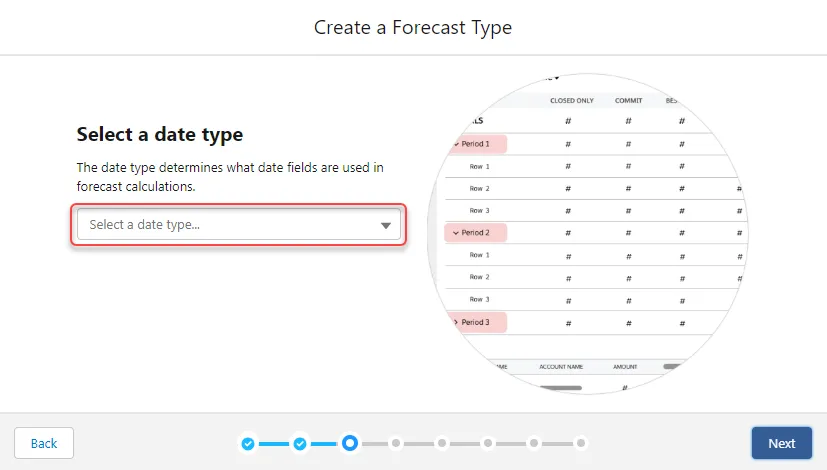
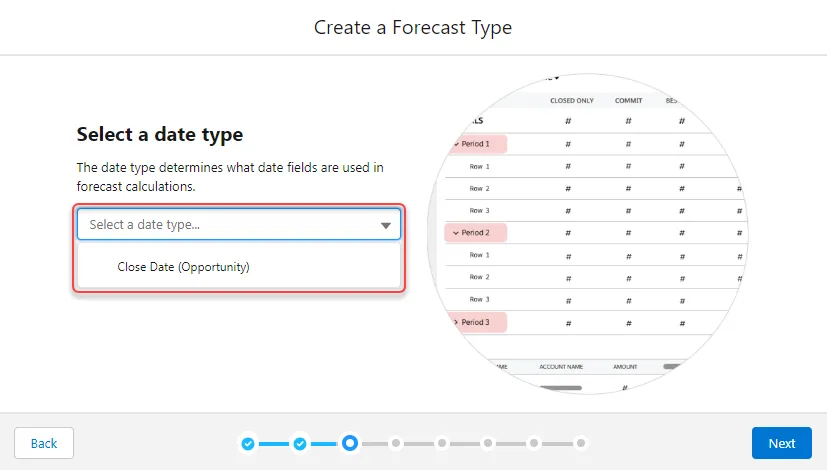
After selecting a Measure, click on the Next button. On the next window, Select a Date Type for the forecast calculations. For example, we will select Close Date (Opportunity). The list shows the SObject name in the brackets along with the field name.
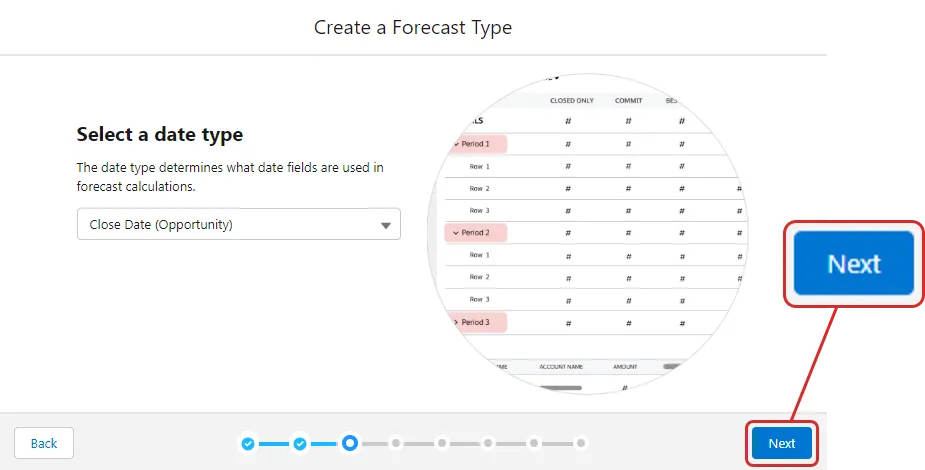
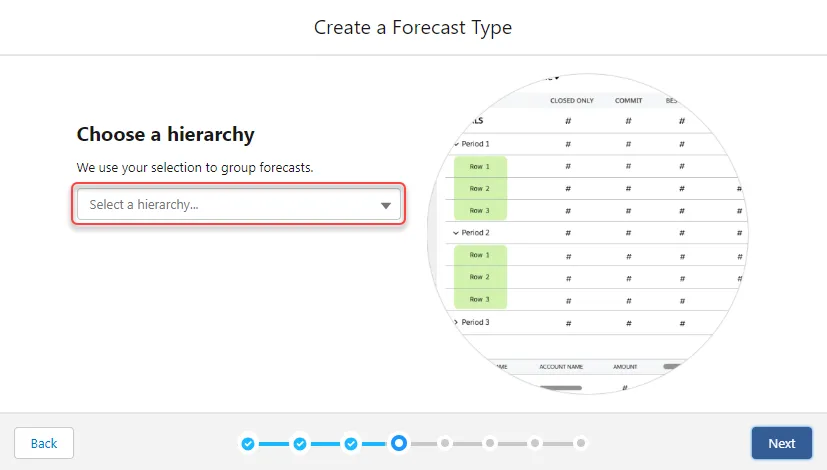
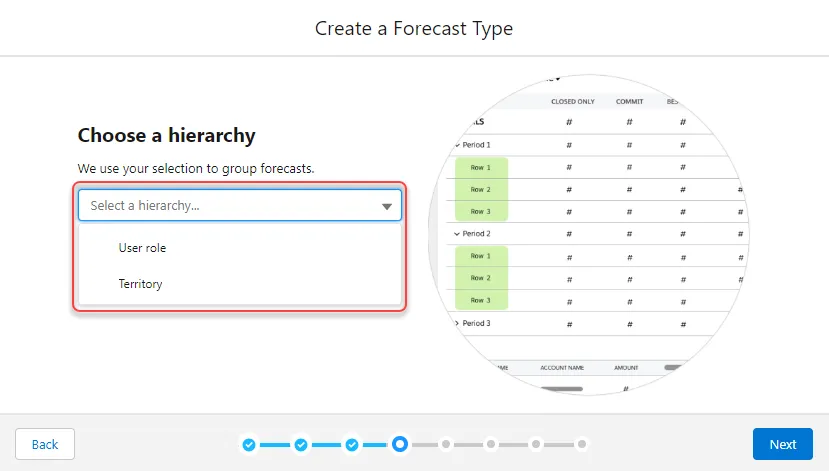
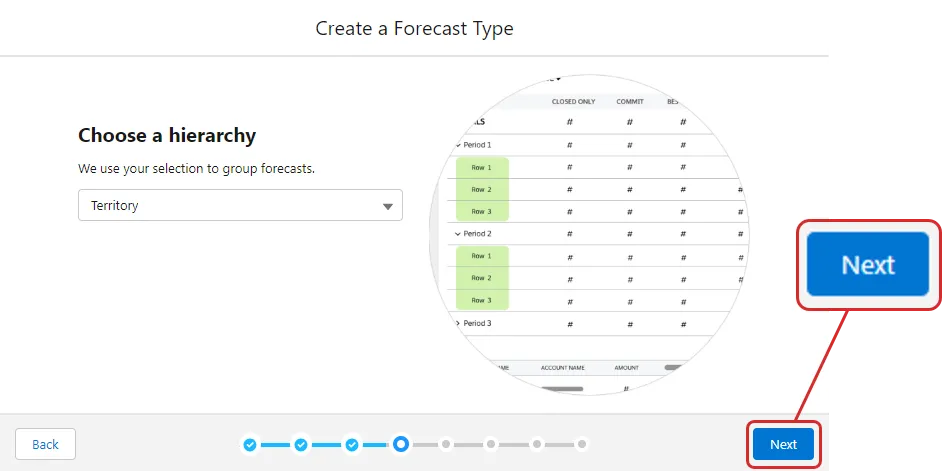
After selecting the Date Type, click on the Next button. On the next window, Select a Hierarchy for the forecast calculations. Select Territory type of hierarchy, that we have already created, from the list that shows all the available hierarchies.
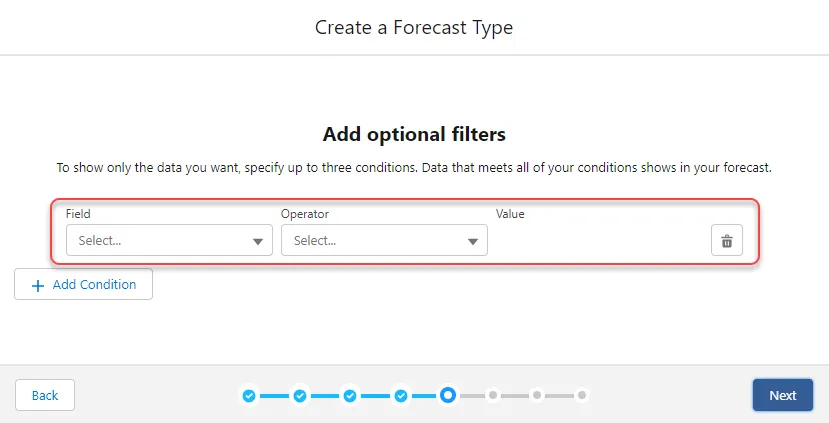
After selecting the Hierarchy, click on the Next button. On the next window, create filters for the forecast calculations. Multiple filters can be added, with logical operations performed on them.
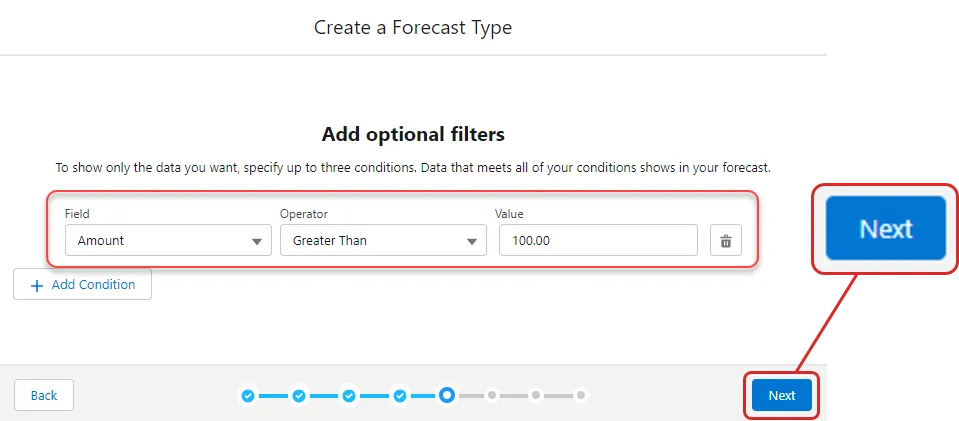
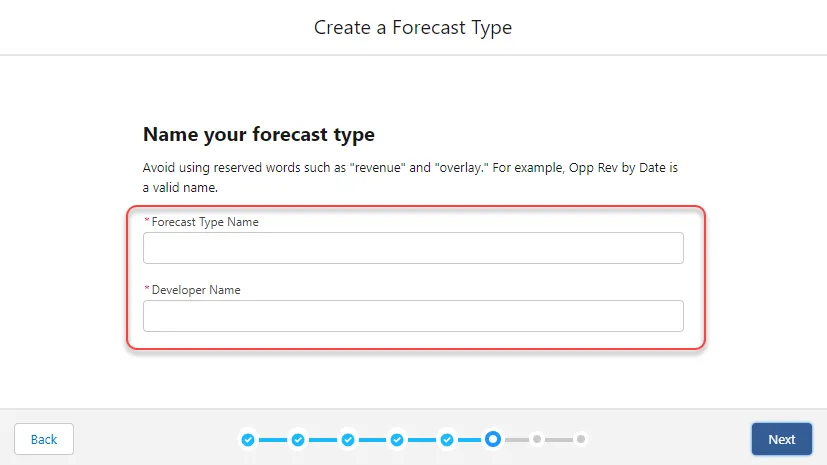
After setting Filters, click on the Next button. On the next window, set the Name and Developer Name for the forecast. The Developer Name is the API name for the forecast.
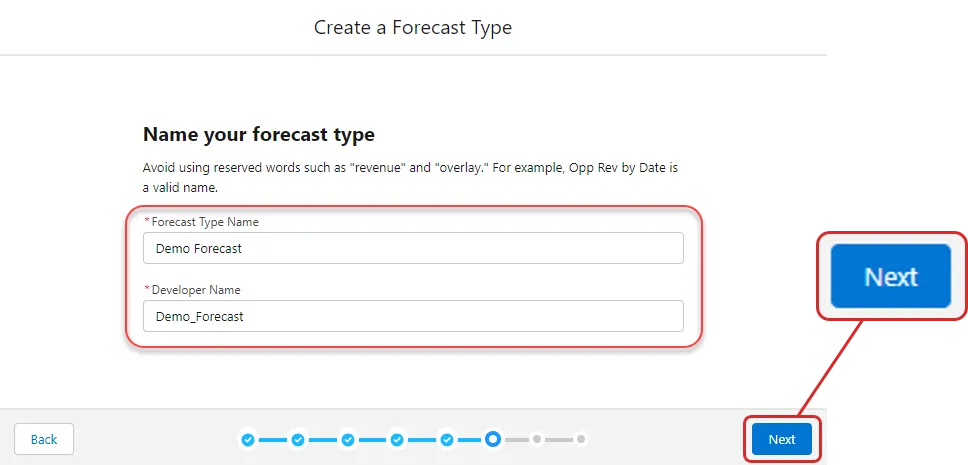
After setting the Name and Developer Name for the forecast, click on the Next button. In the next window, the user can review the settings before saving them.
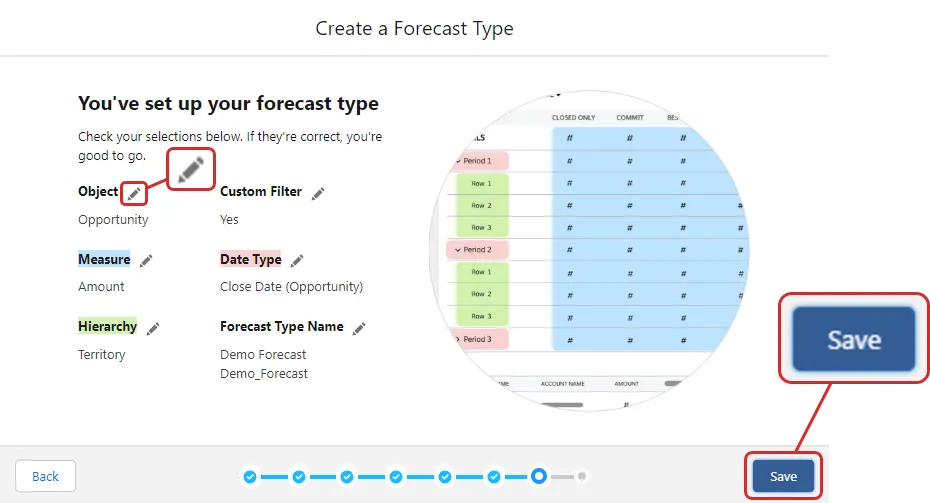
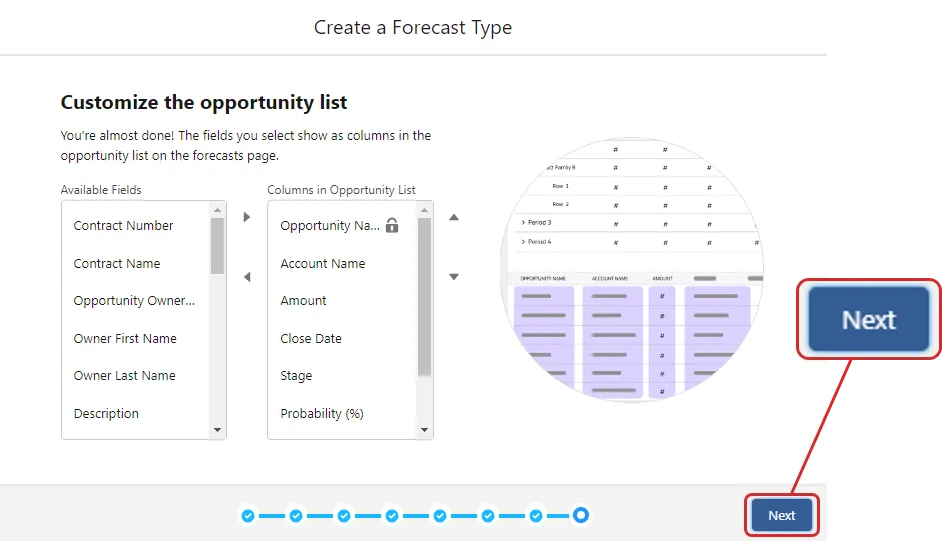
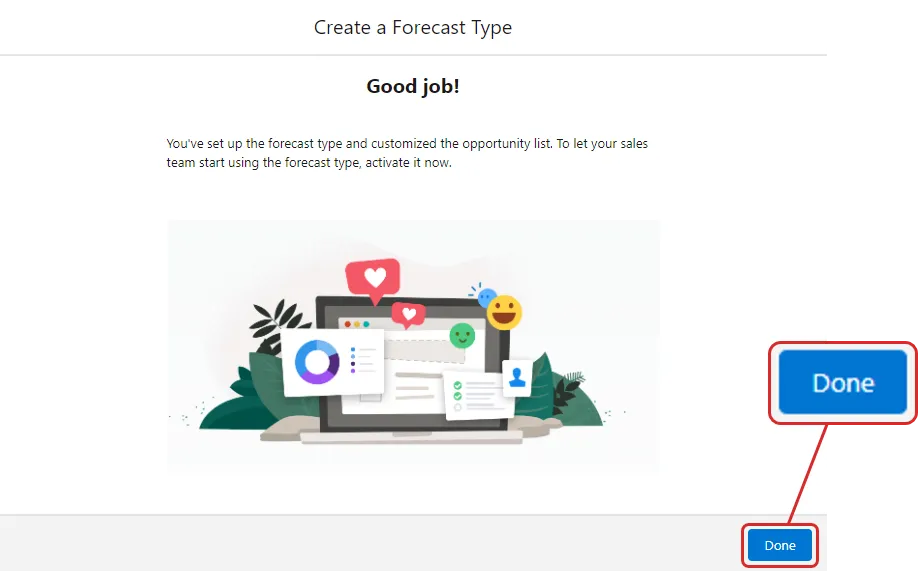
Upon reviewing the settings, the user can click on the Save button After clicking on the Save button, one last optional step remains to set the columns for our list. After selecting the columns, click on the Next button.
On clicking the Next button, it might take a little while to move to the next screen. Once the forecast has been created, click on the Done button to finish the process.
Once the Forecast Type is created, it will be listed in the Available Forecast Types section. In the list, further options for the Forecast Type can be opened from the Down Arrow.
- Deactivate/Activate: Used to activate or deactivate the forecast type.
- Edit Opportunity List: Allows the alteration of the opportunity list.
- Edit Column Filter: Let us modify the column filters.
- Select Columns to Display: Used to set the columns to make visible on the UI.
- Edit Custom Columns: Edits the custom columns.
- Delete: Lets us delete the Forecast Type.


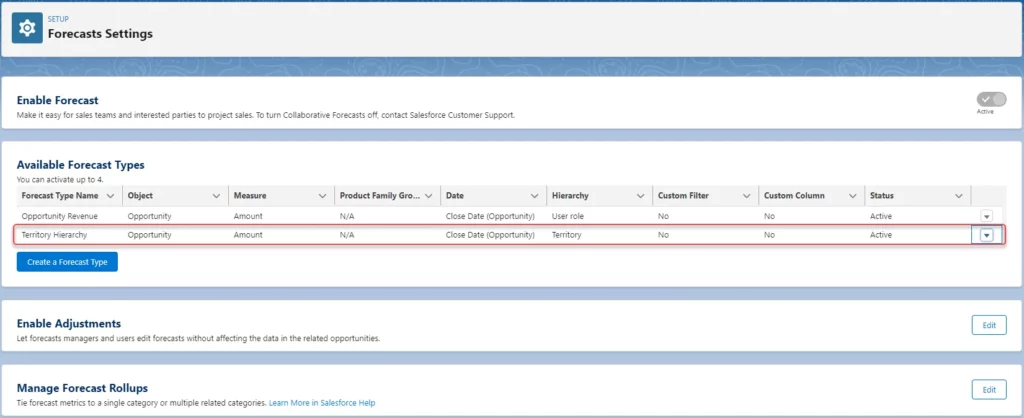
Make sure to Activate the Territory type of Forecast that you just created.
Step 8: Creating Model Rules:
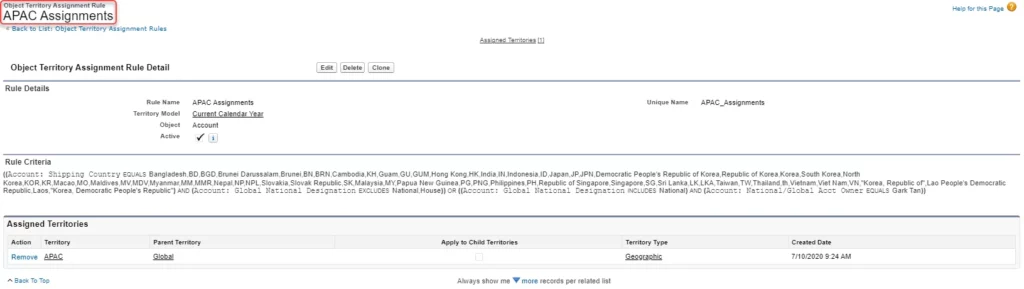
Territory Model Rules are a set of criteria and guidelines used to define how territories are assigned to sales representatives within salesforce. The View Rules button is used to View, Create, Modify, or Delete the rules. To create rules, navigate to: Platform Tools → Feature Settings → Sales → Territories → Territory Models → [Model Name] → View Rules → New Rule

Clicking on the View Rules button will open a new page with the list of all the rules available for the particular model.

New rules can be created by clicking on the New Rule button.

Clicking on the New Rule button will redirect to the new page, where we can fill in the rule configuration.

Rule Name will be entered by the user. Unique Name will be auto populated with the same value as the Rule Name with spaces bring replaced with the underscore. In the Step 2 section in the below screenshot, we will specify the rule with logical conditions. Each rule (Filter Logic) is divided into three parts: Field, Operator, and Value.
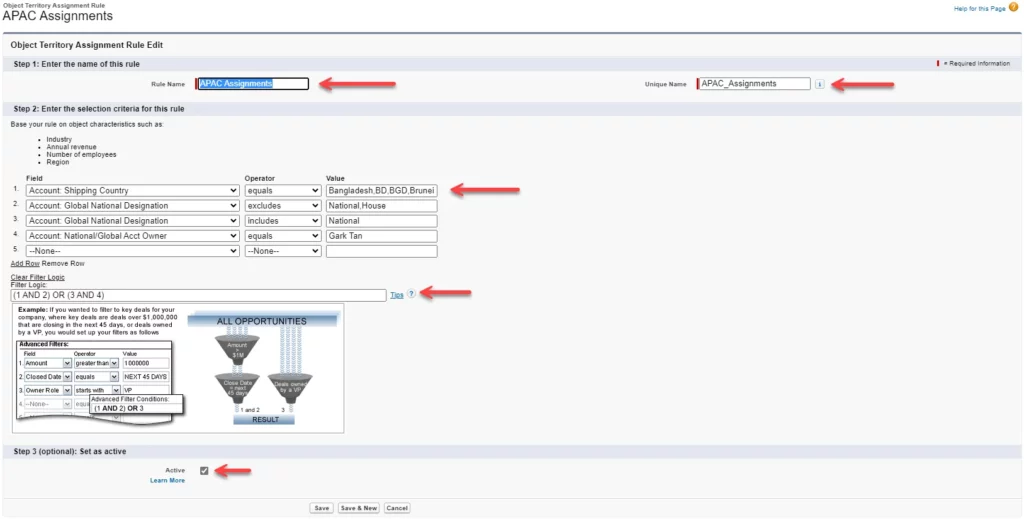
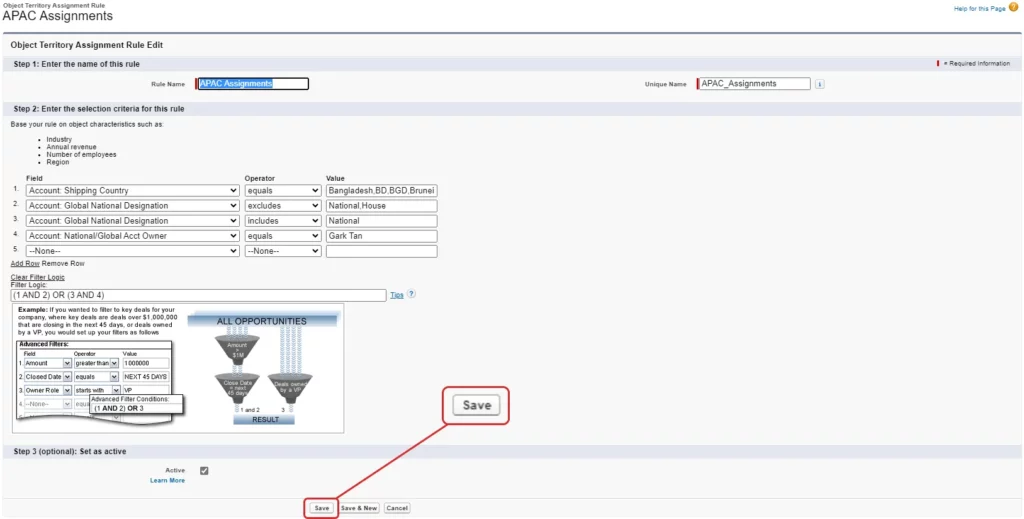
Mark the Active checkbox as Check to activate the rule. Keep the box Unchecked to deactivate the rule. Once done with the configuration, click on the Save button to save the rule.
Step 9: Enable Quota & Forecast Adjustments:
Before we could display the Salesforce Territory Forecasting on the UI, we need to activate the Forecast Type, that we created for our territory. And set the quota for the same. Activate the Territory type of Forecast that we created in the previous step, by accessing the down arrow right next to it.


After activating the forecast type, navigate to the Forecast Quota: Platform Tools → Feature Settings → Sales → Forecasts → Forecast Quota
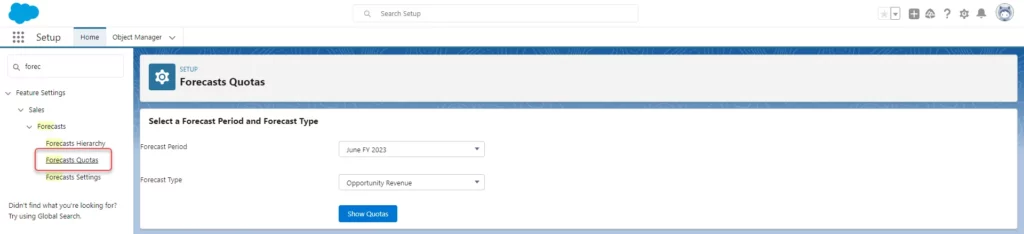
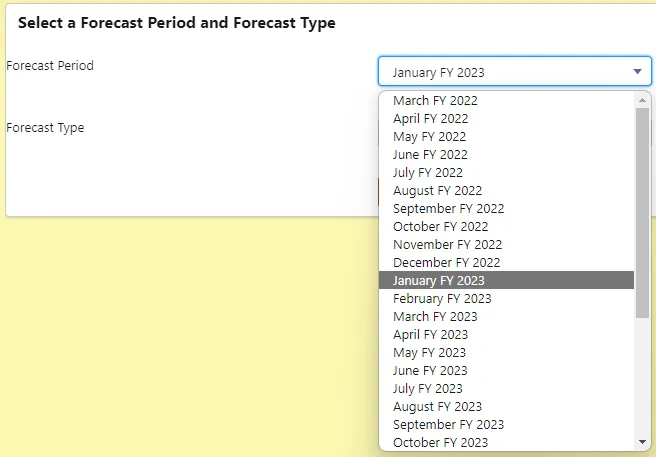
Here we can fetch the list of users for the Forecast, for a defined period of time.
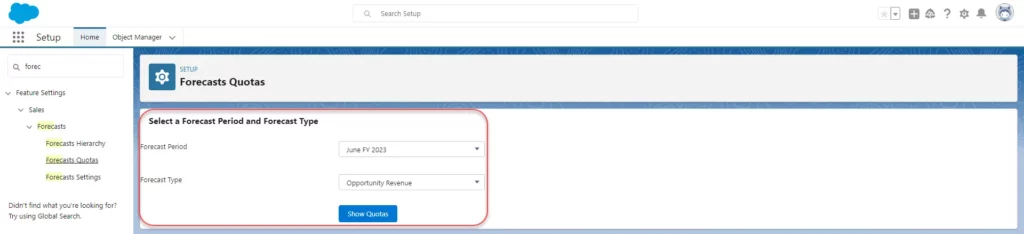
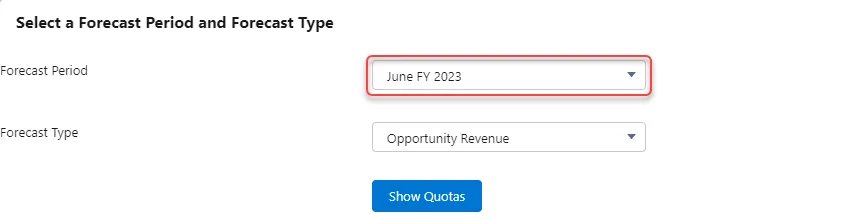
We can select the period for the forecast from the Forecast Period list. We can select the period by monthly intervals.
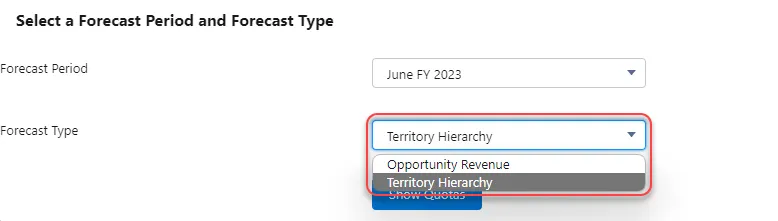
Type of the forecast can be selected from the Forecast Type picklist field. Select the one which we created for our Territory.
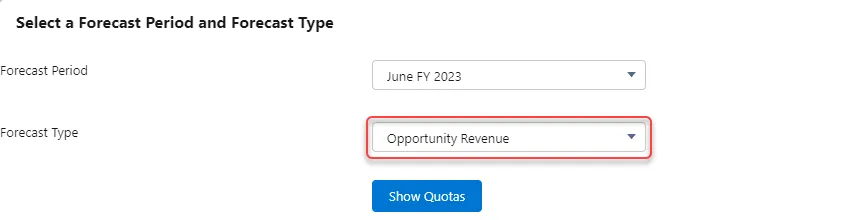
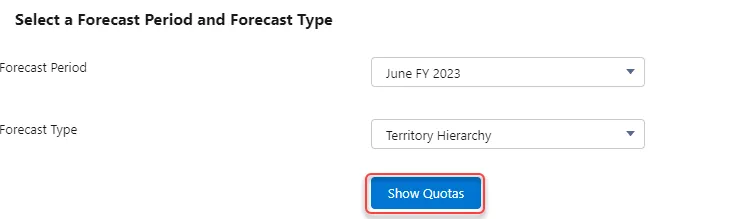
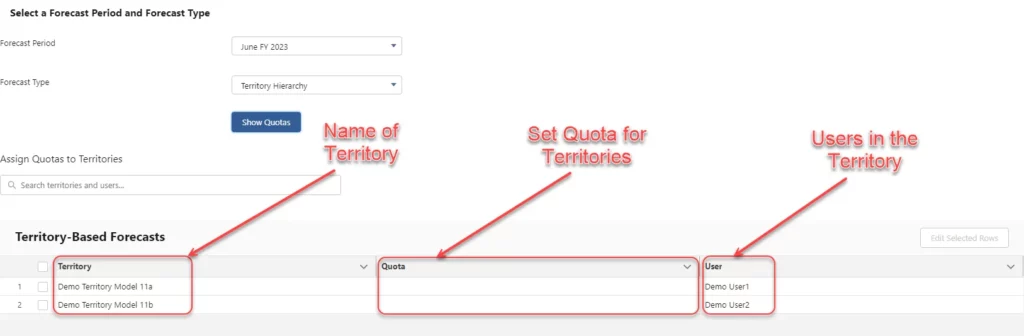
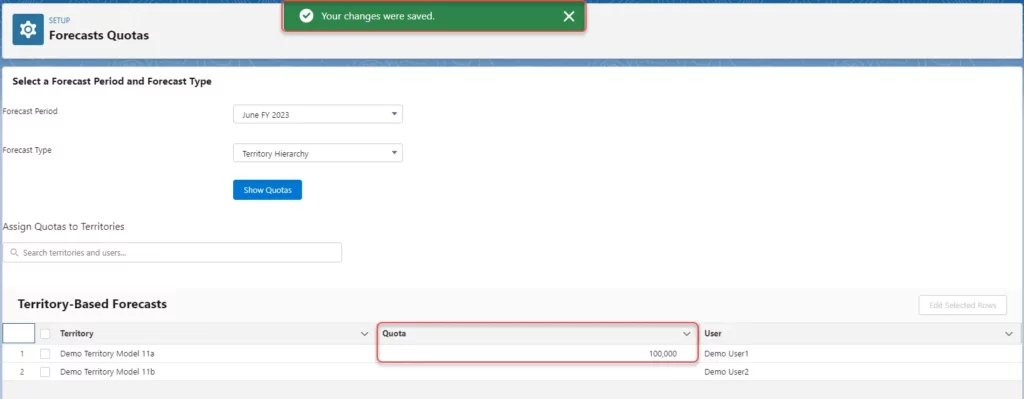
After selecting the time period and the forecast type, click on Show Quotas button to fetch a list of all the users with their quotas for the set time period.
In the Territory-Based Forecast list, there are three main columns:
- Territory: Lists all the territories in the territory hierarchy.
- Quota: Lists the quota set for each territory. From here, we can set and edit the quota for each territory.
- User: Lists the users of the territory.
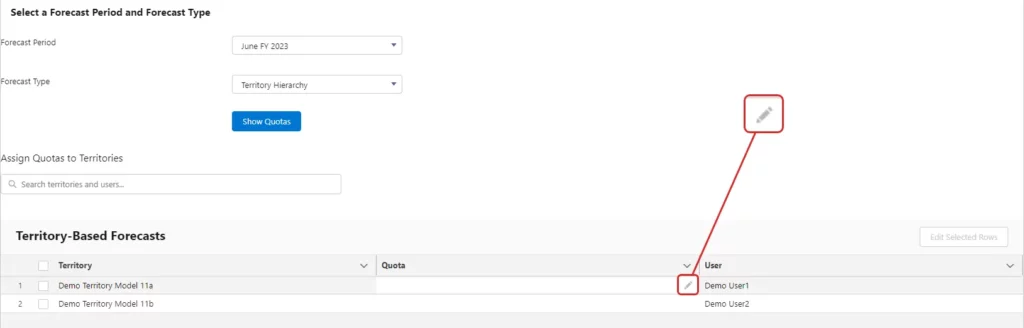
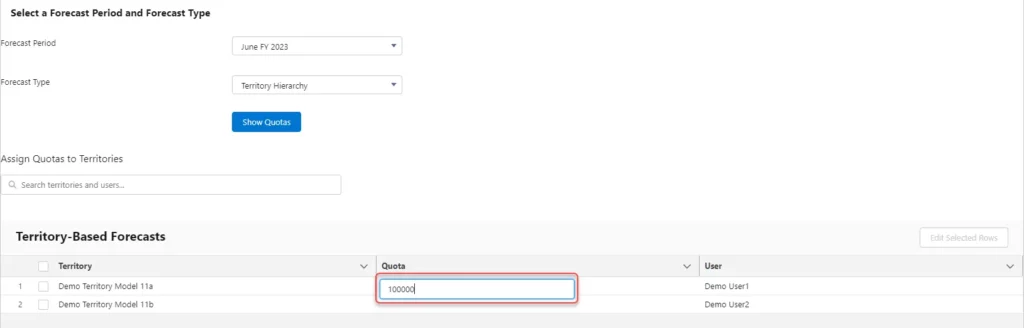
Below is a demonstration of how we can set or edit the quota for each user by clicking on the Pencil icon and typing in the quota value for each territory.
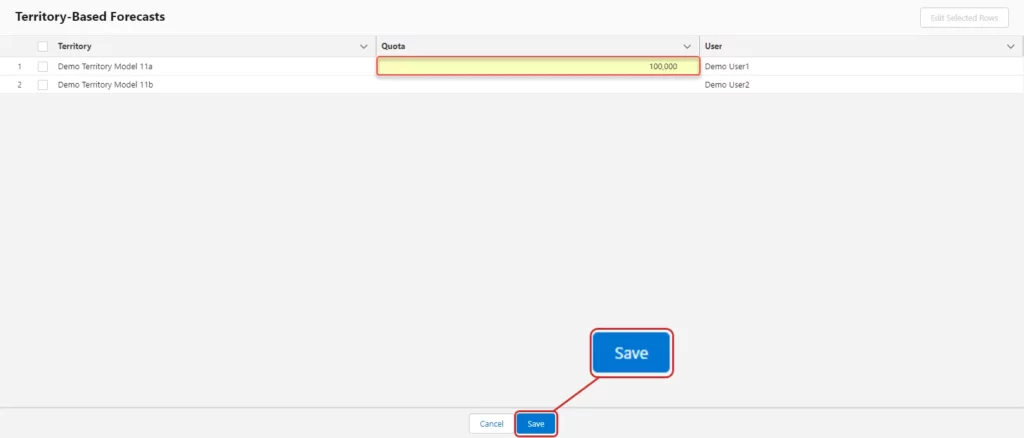
On editing or setting the value for the quota for each territory, click on the Save button to save all the changes. On saving, a success toast will appear confirming that the changes have been saved.
Disable:
In rare cases, if you might need to Disable the Territory Management, below steps can be followed. Below steps are not the part of setup, rather they will undo whatever has been done in above steps.
Skip this section if you do not want to disable the Territory Management. Territory Settings can be disabled by clicking on the Disable Enterprise Territory Management button at the bottom of the Territory Settings page.

A pop-up will be shown asking you to confirm if you want to disable the Territory Settings. Click on Disable Enterprise Territory Management to disable the settings.
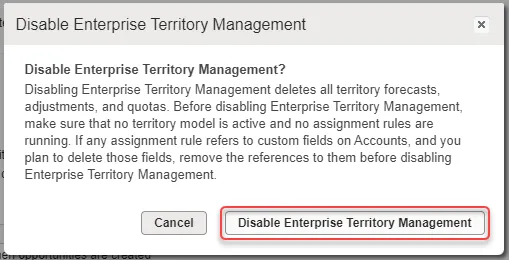
Territory Settings have been disabled.
UI Demonstration:
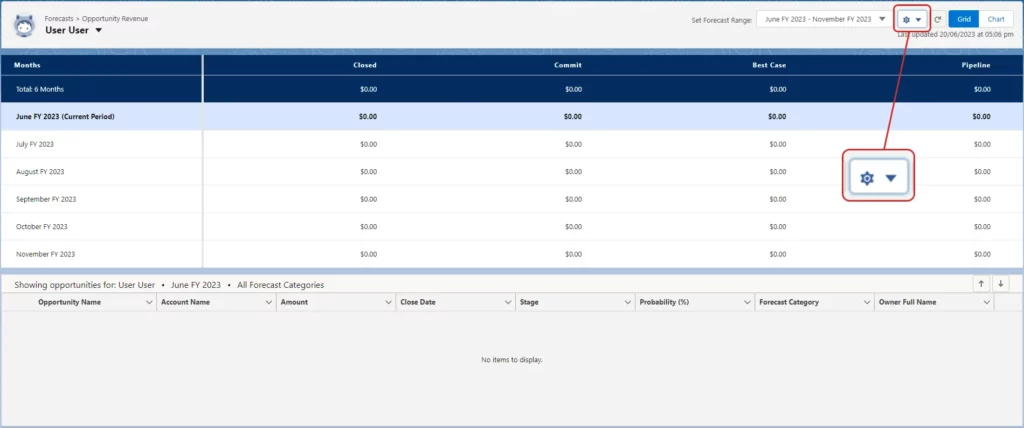
After making all the configuration in the setup of the org, the Territory Forecast will now be available to view in the App. We can see the Forecasts by going to the Forecast Tab. We can do that by searching for the Forecast in the App Launcher. It will open the forecast tab, which shows the quote for a manager, along with its opportunity records.

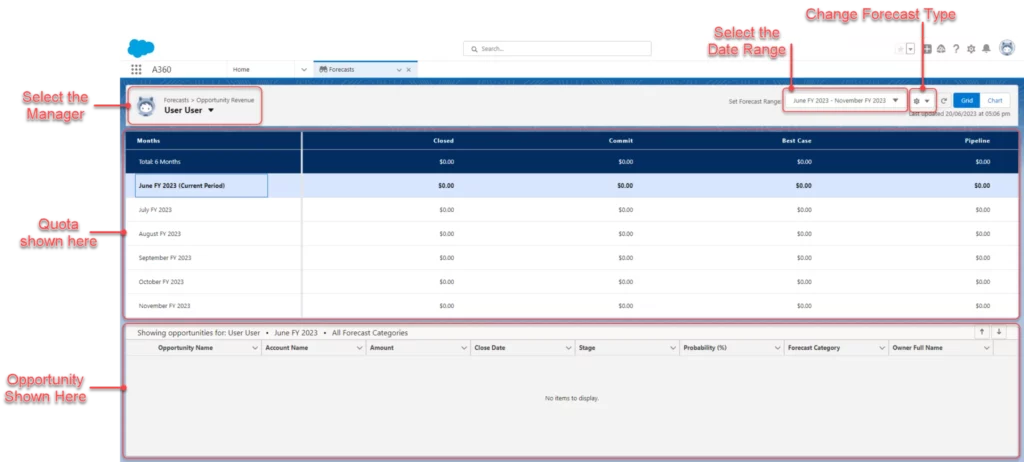
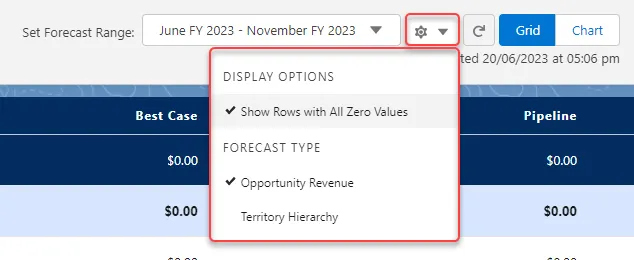
The forecast in the app can be observed in the above & below screenshot. By default, it is showing us the Opportunity Revenue forecast, instead of the Territory Forecast. We can change the view by changing the Forecast Type from the gear icon.
Clicking on the Gear icon will open a list of Display Options & Forecast Type. From the list, we can change both. For our configuration, we will choose the Territory Hierarchy listed under the Forecast Type.

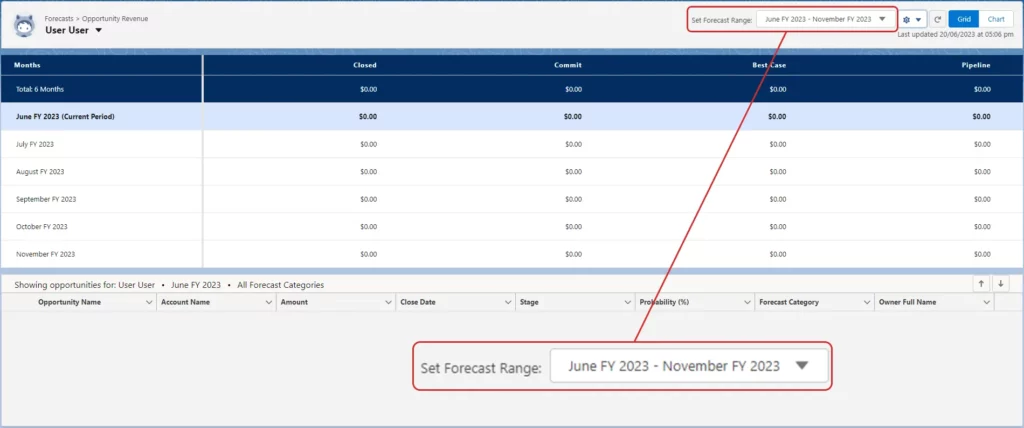
We can also change the manager to change the view according. It can be done from the top left, where the user’s name is mentioned. Clicking on it will open a list, where you can search for the users and select one from the list. Changing the users will change the forecast view. Below screenshot shows us the Opportunity Revenue view for the “User User” user.
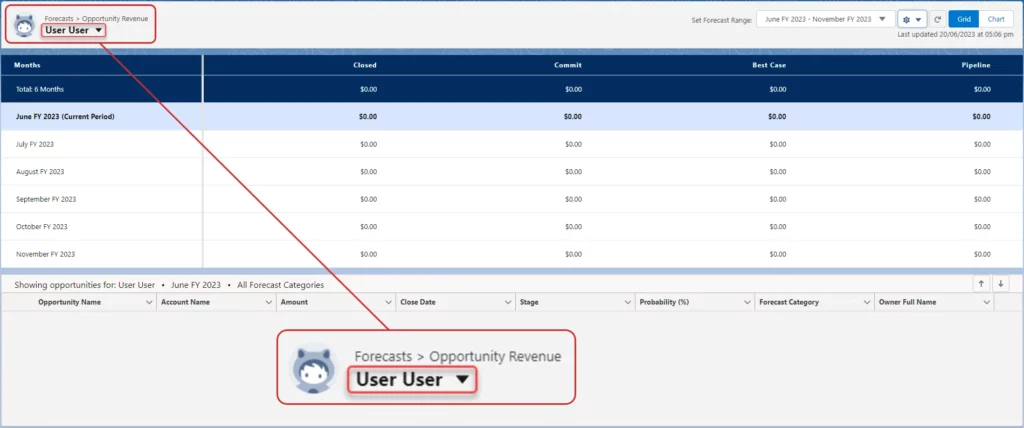
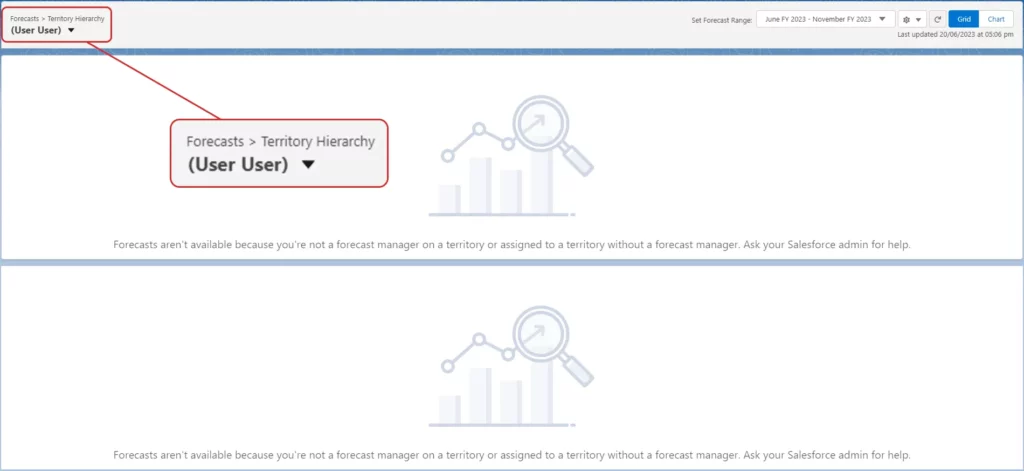
On changing the Forecast Type to the Territory Hierarchy, we observe an empty forecast area because the Salesforce Territory Forecasting has not been set for the “User User” user. So, we will change the user by clicking in the highlighted area, and search for our user for which we have created the Forecast Type.
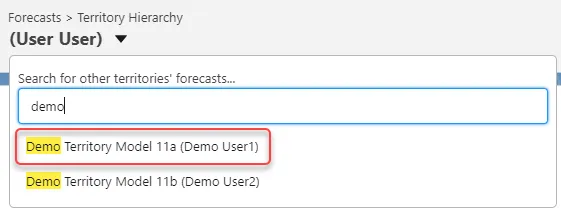
On changing the user to the configured user, the forecasting data appears on the page.
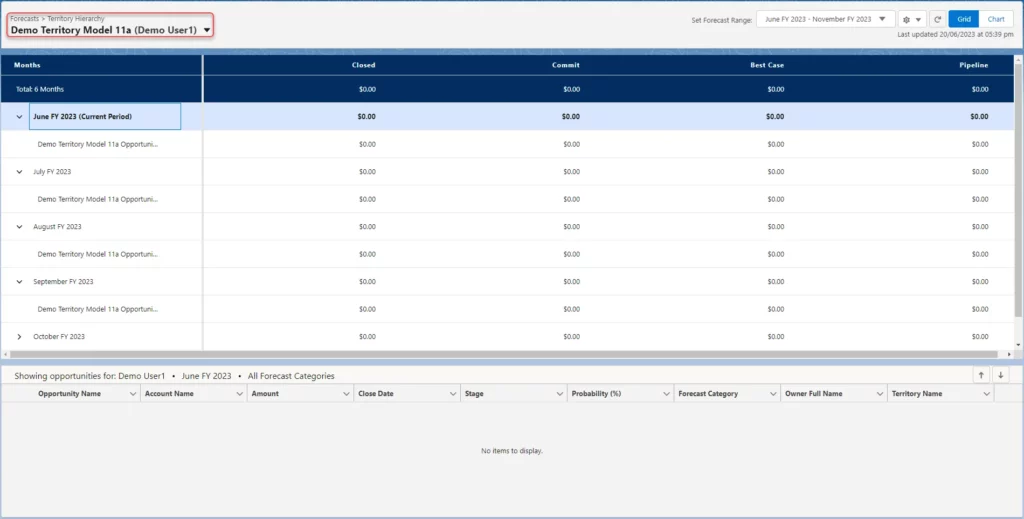
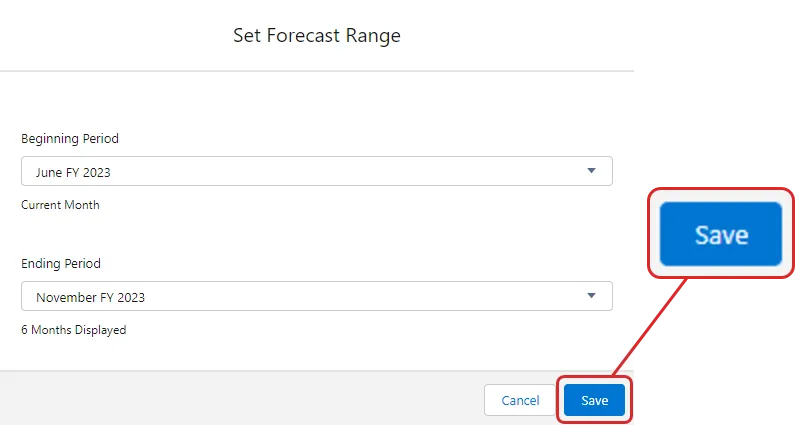
The range for the salesforce territory forecasting can be set from the Set Forecast Range option on the top of the page. Clicking on it opens a pop-up window, which lets us select the beginning and ending period. By default, it is set to a period of 6 months, which can be changed.
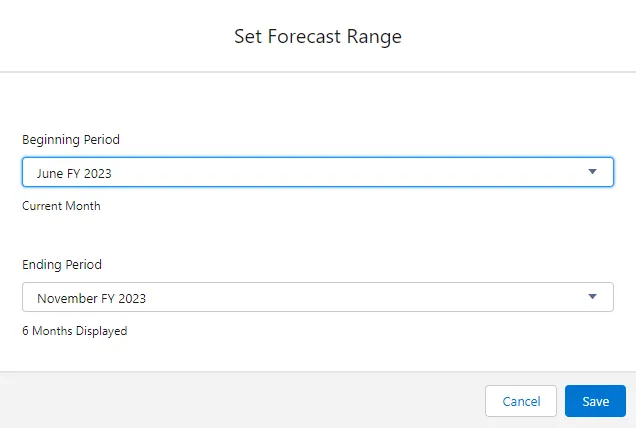
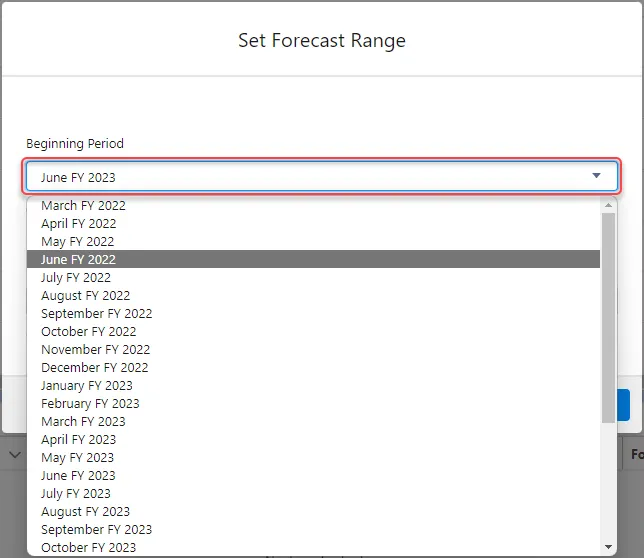
Monthly intervals can be selected from the dropdown list, for the beginning and ending period. On selecting the period, click on the Save button to save the Forecast Range.
That’s all folks! That is pretty much all you needed to know and learn to set up the Salesforce Territory Forecasting in your org. Play around with the settings, try something new. Setting up the Salesforce Territory Forecasting can provide a structured and data-driven approach for your sales team to plan the future sales. Take advantage of this robust feature and customize it to tailor the needs unique to your business.